|
|
Post by Johansson on Mar 9, 2017 17:56:45 GMT -5
Tonight I finished one more thing on the "to do" list, securing the compressor cover radially. 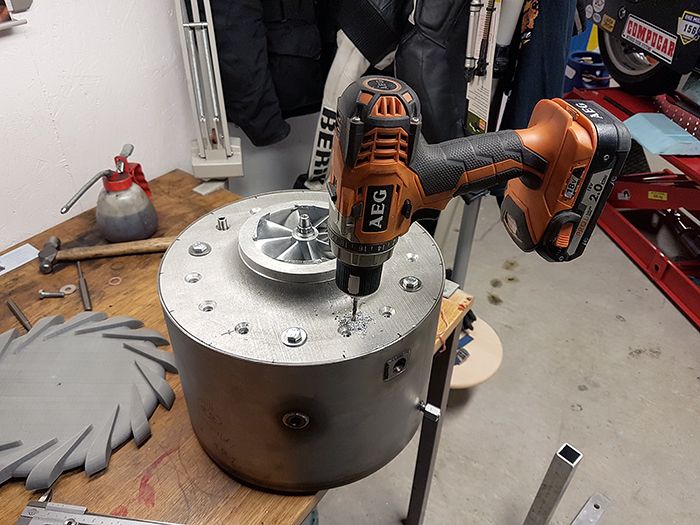 With the help of a bit of duct tape I had the compressor wheel centered in the cover and could drill two 4mm holes through both cover and diffusor plate. They were then threaded for a pair of M5 screws that would act as dowels. 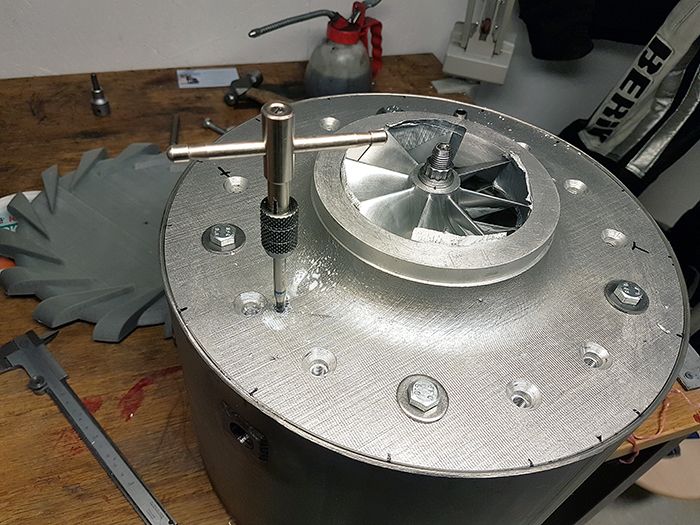 And the job is done! I used screws with an unthreaded length close to the top where it fits through the compressor cover, this gave a very snug fit which will center the compressor wheel in the cover every time I assemble the engine. 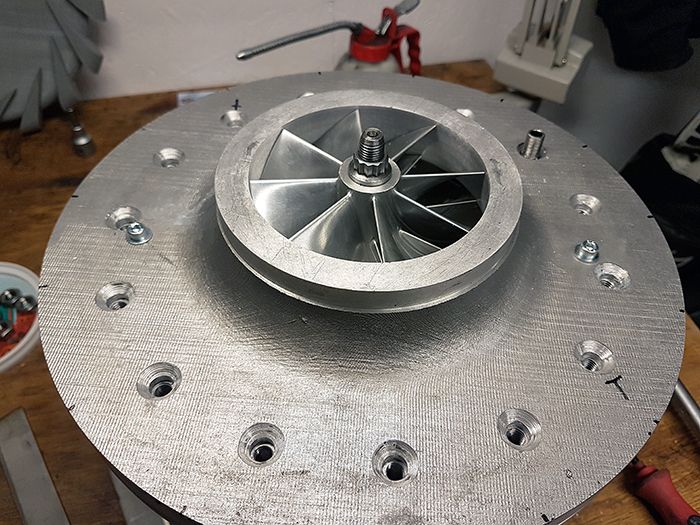 Cheers! /Anders |
|
|
|
Post by Johansson on Mar 21, 2017 15:49:22 GMT -5
One of the few things left to do before the engine is ready to be mounted in a test stand was to secure the engine casing to the compressor cover, a job I had saved until last since it took a while to decide how to do it. 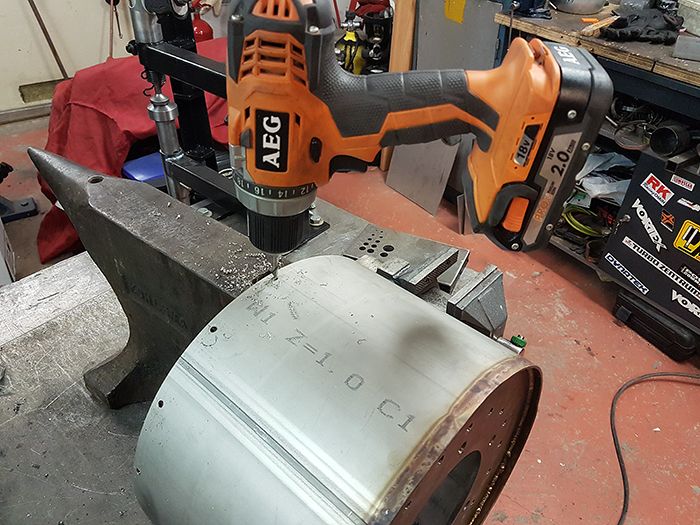 I drilled 18 5mm holes in the stainless casing, then I assembled the engine and continued drilling the holes into the cast compressor casing. I used a piece of tape on the drill to mark out the correct depth so I wouldn´t drill the holes through to the air passages. 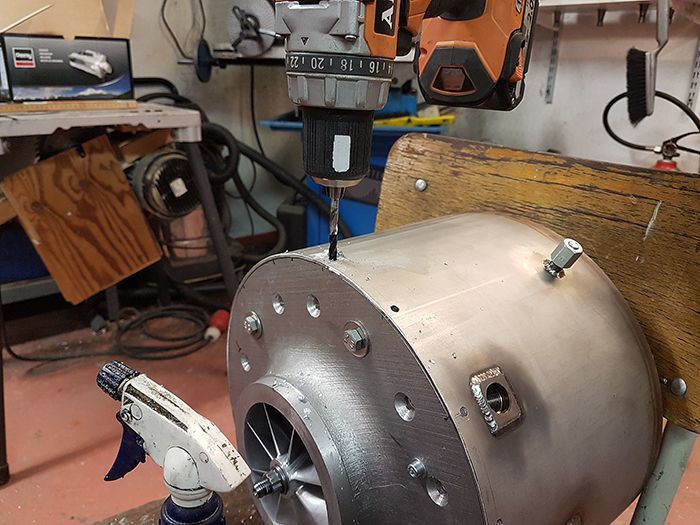 Threading the holes for M6 screws. 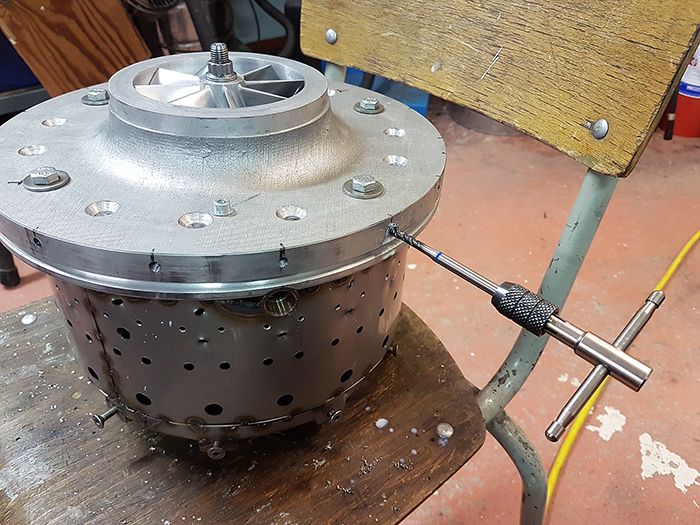 With the holes treaded I assembled the engine with the cover screws in place, this will certainly do!  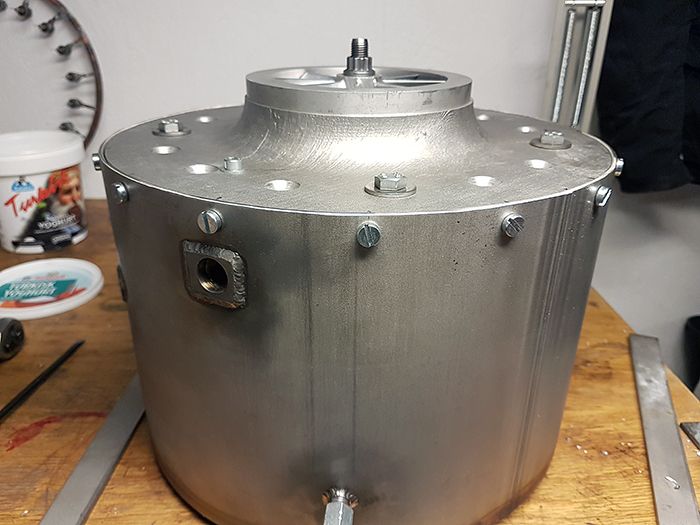 Cheers! /Anders |
|
|
|
Post by racket on Mar 21, 2017 16:20:21 GMT -5
Hi Anders
That ain't going anywhere now.
A bellmouth on the front, a jetnozzle on the rear and she'll be wanting to make some noise :-)
Cheers
John
|
|
|
|
Post by Johansson on Mar 21, 2017 16:53:25 GMT -5
Hi Anders That ain't going anywhere now. A bellmouth on the front, a jetnozzle on the rear and she'll be wanting to make some noise :-) Cheers John Hi John, Yup, a first start is getting pretty darn close. I asked Olov to pick up some material for the test rig for me since I cannot seem to fit 6 meter tubes in my Citroen C1... I´ll see if I can print out a nice bellmouth in PLA plastic for the compressor, later I will have to make an aluminum one with an integrated starter mount so there is no idea to overdo it just for a few leaftblower starts. Cheers! /Anders |
|
nersut
Veteran Member

Joined: September 2012
Posts: 223
|
Post by nersut on Mar 21, 2017 22:25:35 GMT -5
Hi Anders, it's very nice to read your & others builds. I have "secretly" (not logged in)  visited this site frequently & read all the good progress in here  BIG thumbs up to you guys & good luck with the JU-02 & the jet bike! |
|
|
|
Post by Johansson on Mar 23, 2017 16:07:29 GMT -5
I found a little spare time to get some jobs done on the engine today. First off the jet nozzle was made, I turned a flange in the lathe and cut and rolled a jet nozzle in 1mm stainless. The angle of the picture fools the eye a bit, the nozzle looks straight but it is tapered. 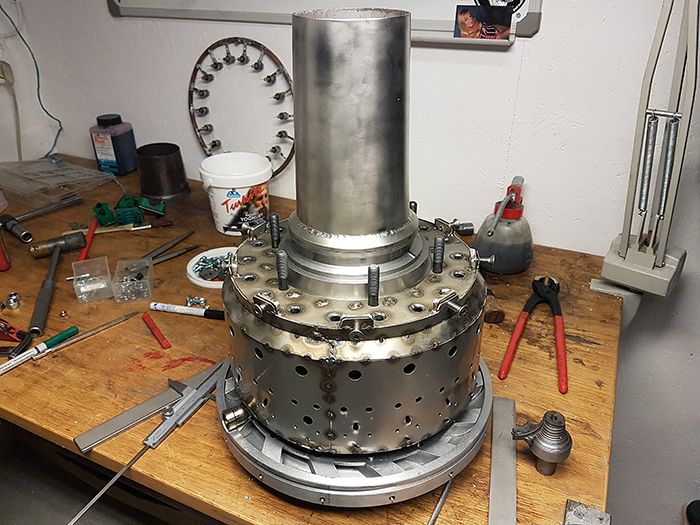 Here she is with her clothes on, the nozzle should get a much prettier color as soon as the engine is started. 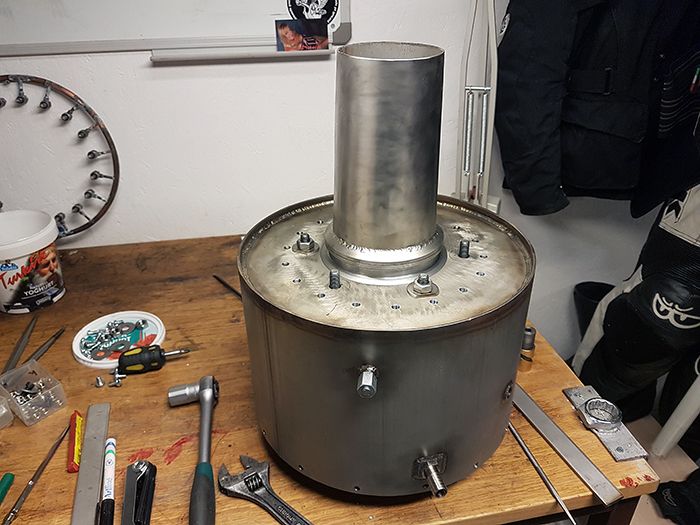 Then I managed to find a suitable chunk of aluminum so I scrapped my earlier idea with a 3D printed bellmouth and decided to make one out of alloy instead. 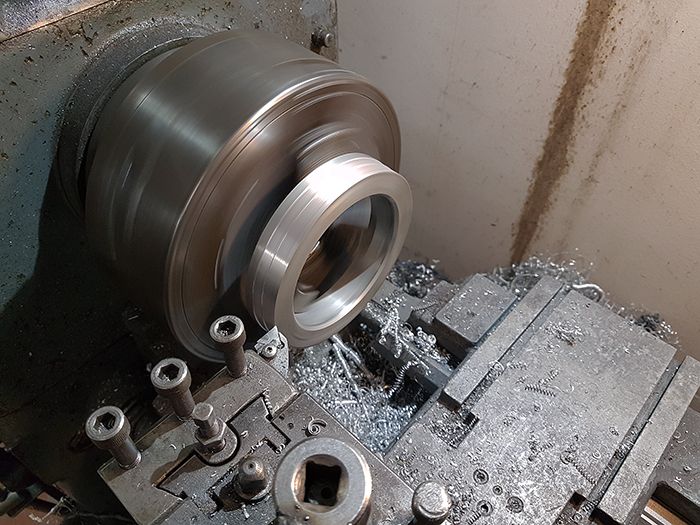 Here it has got its inlet radius and v-band flange groove. 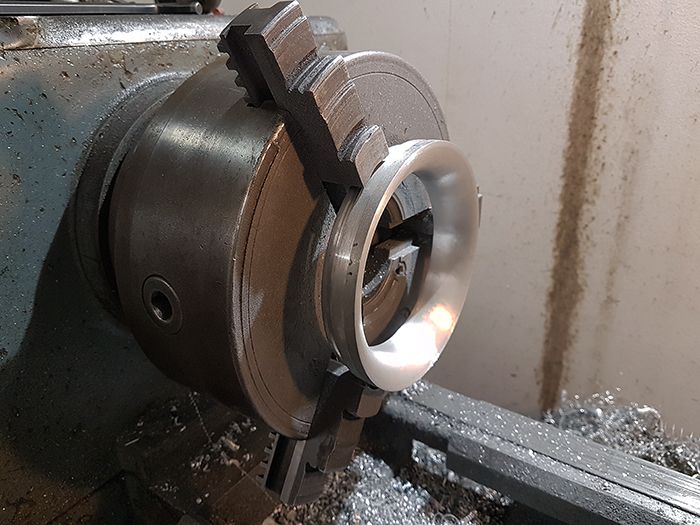 Milling the outside radius. 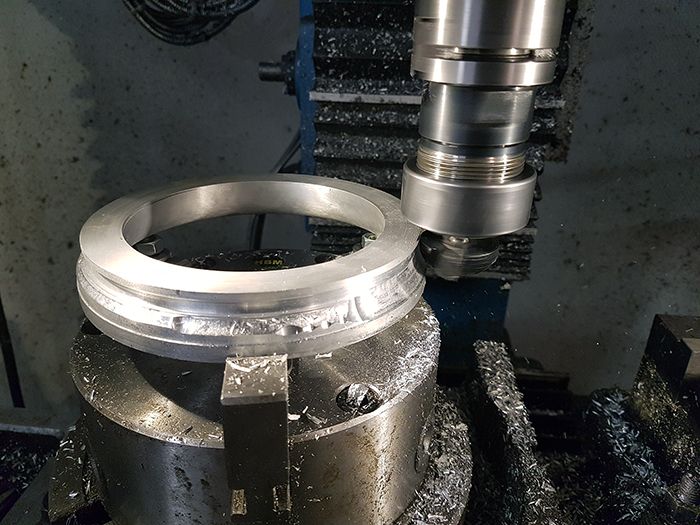 Olov lended me a v-band clamp so I had something so test fit it with, I haven´t cut the matching flange groove in the compressor cover yet so the bellmouth is just stacked on top of the cover in the picture. 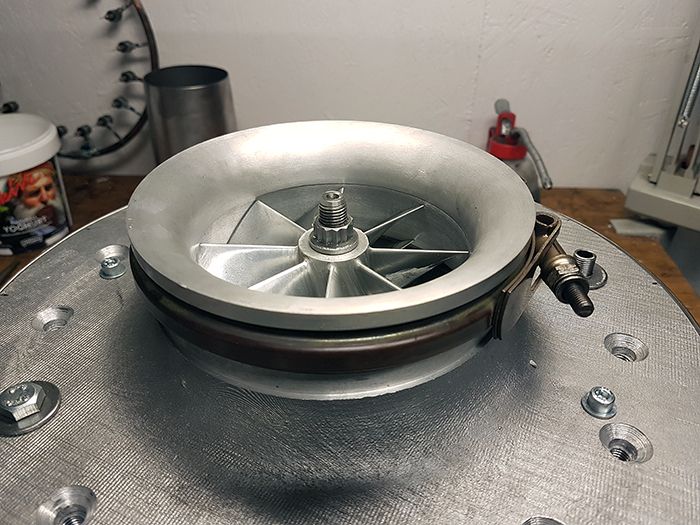 Cheers! /Anders |
|
|
|
Post by racket on Mar 23, 2017 16:39:59 GMT -5
Hi Anders
Will it be possible to machine a shallow rebate into the comp cover snout with a matching one in the bellmouth so that there is positive concentricity between the two parts so that you don't need to fiddle with the V band during tightening to get things in alignment, very important not to have any sign of a step at the joint so close to the inducer .
Jetpipe looking good :-)
I'm getting excited , looking forward to seeing her assembled
Cheers
John
|
|
|
|
Post by Johansson on Mar 23, 2017 16:46:19 GMT -5
Hi Anders Will it be possible to machine a shallow rebate into the comp cover snout with a matching one in the bellmouth so that there is positive concentricity between the two parts so that you don't need to fiddle with the V band during tightening to get things in alignment, very important not to have any sign of a step at the joint so close to the inducer . Jetpipe looking good :-) I'm getting excited , looking forward to seeing her assembled Cheers John Hi John, Actually I had planned to to that when I have the comp cover in the lathe for the v-band groove machining, I have made one that centers the jet nozzle flanges. V-band clamps are so very practical compared to the half dozen of small threaded holes and screws that was my first idea for bellmouth fastening, makes for very easy disassembly and no risk of dropping a small nut into the engine. I am too, the turbofan build will soon start to interfere with the JU-02 project but I hope to have the test stand ready before the summer so I can give her a spin when it is warm outside. Cheers! /Anders |
|
Chuks
Senior Member
Joined: August 2015
Posts: 497 
|
Post by Chuks on Mar 24, 2017 18:11:03 GMT -5
hmmm,
thats great ANDERS, all looking good as expected.
turbofan? i guess our eyes are gonna be filled up with your continuous surprises.
looking forward for the great they of spool...
|
|
|
|
Post by Johansson on Mar 26, 2017 15:03:09 GMT -5
I finished the bellmouth add-on tonight, the compressor cover was put in the lathe and a groove for the v-band clamp was cut. I also cut an aligning edge so the bellmouth will center perfectly every time. 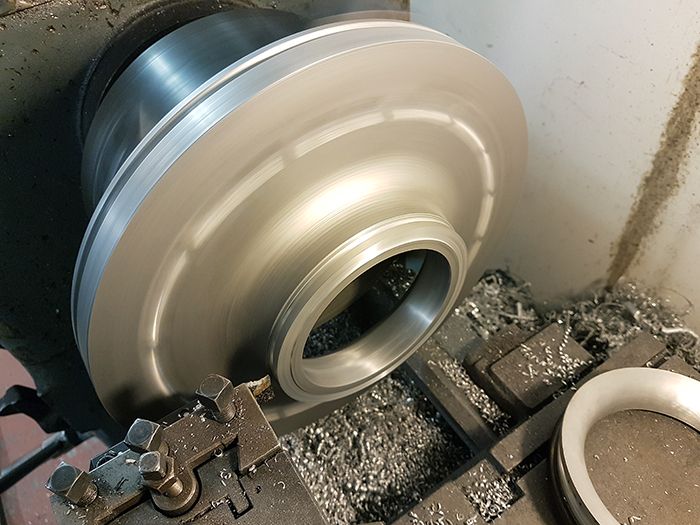 A matching edge was then cut in the bellouth piece.  With that done I fit the two together and smoothed everything out with the shop air grinder and a soft sand paper disc until I couldn´t feel the edge any more. 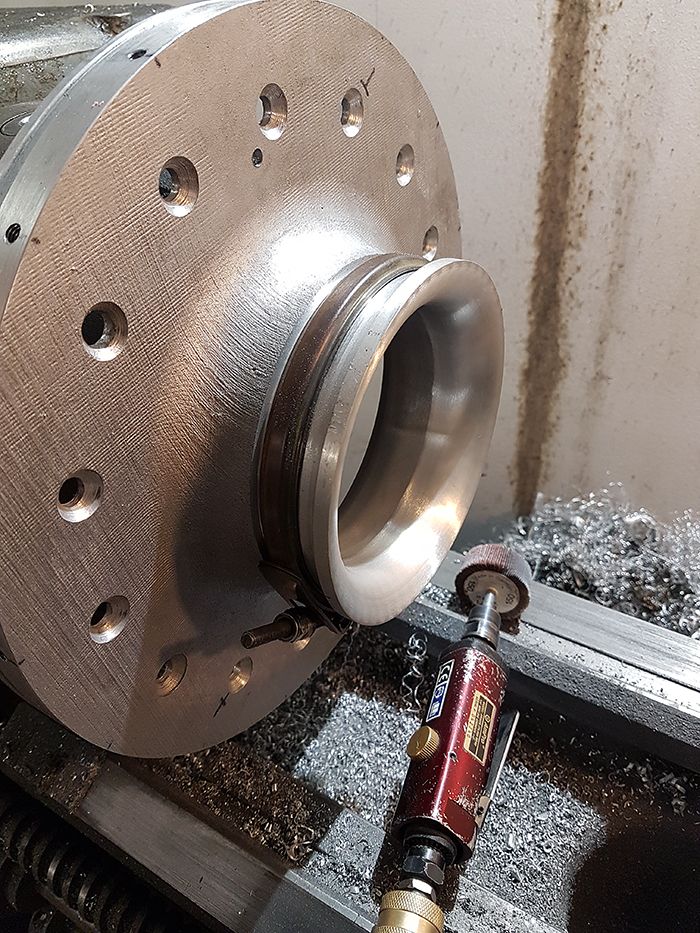 Like a glove! 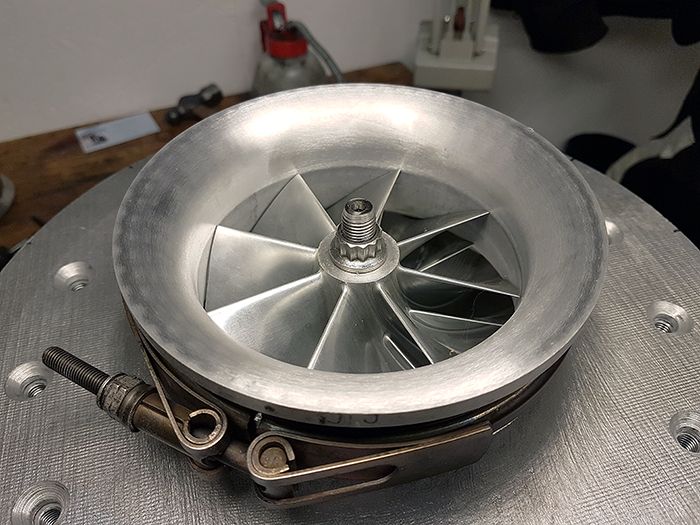 Next up is to take everything apart, clean it and drill all of the bolts and stuff for wire locking.  Cheers! /Anders |
|
|
|
Post by racket on Mar 26, 2017 16:33:24 GMT -5
Hi Anders
Heh heh ..............18 months work is getting close to completion , all looking good :-)
Cheers
John
|
|
|
|
Post by Johansson on Mar 27, 2017 1:12:26 GMT -5
Hi Anders Heh heh ..............18 months work is getting close to completion , all looking good :-) Cheers John Hi John, It sure is. I am most satisfied with the engine design regarding ease of disassembly/assembly, I have managed to simplify much of the JU-01 design so that there is a minimum of parts in JU-02. I can probably take the whole engine apart in five minutes without rushing it. Cheers! /Anders |
|
|
|
Post by Johansson on Mar 30, 2017 13:21:02 GMT -5
More assembly jobs done on JU-02.  I´ve drilled all of the engine cover bolt heads for wire locking, managed to break all but one of my 1.5mm drills during the process... 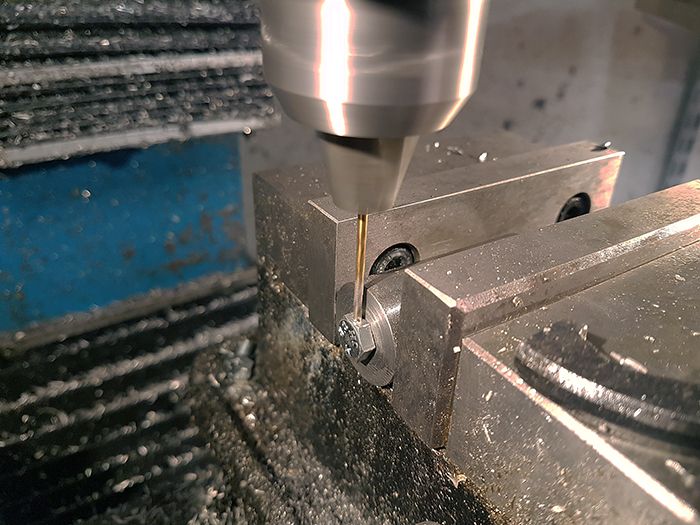 The scavenge line Loctited and wire locked. 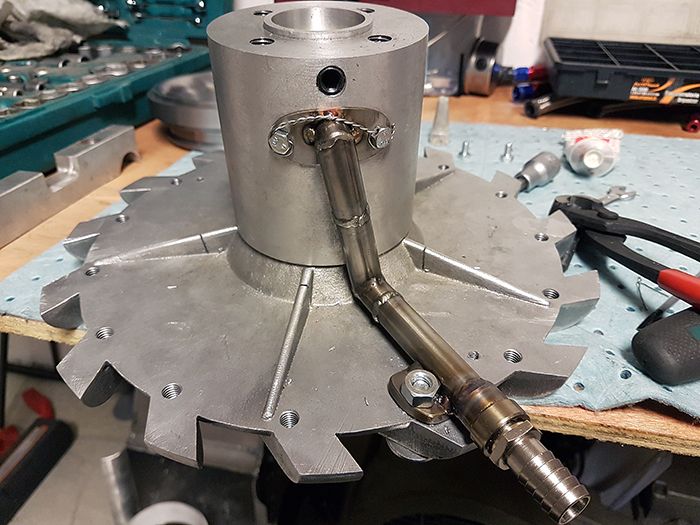 Torquing the NGV bolts to 70Nm with blue loctite.  Here I am angle torquing the compressor nut, 130-145° is the recommended twist of the nut. 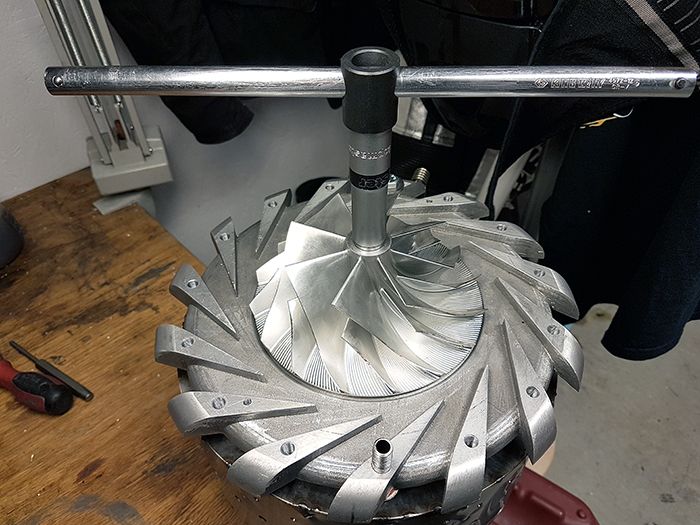 I am currently taking the last 0.1mm from the turbine housing to get the 0.6mm radial clearance John suggested. 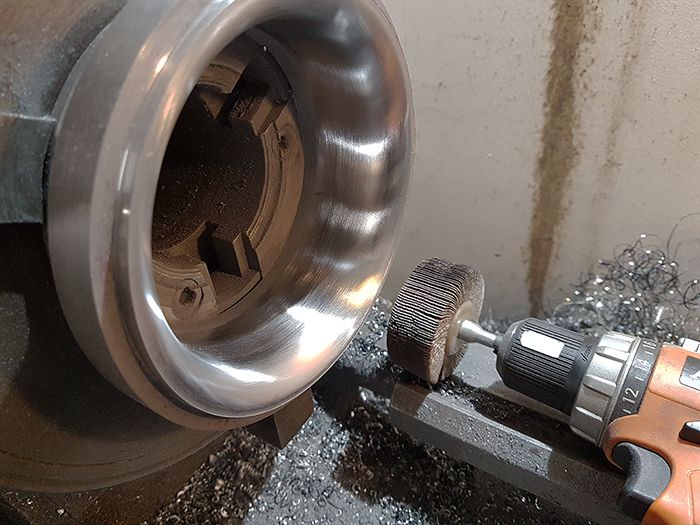 I have ordered a set of fancy stainless flanged hex socket screws for the compressor cover and engine casing, looks much better than the ordinary allen screws. 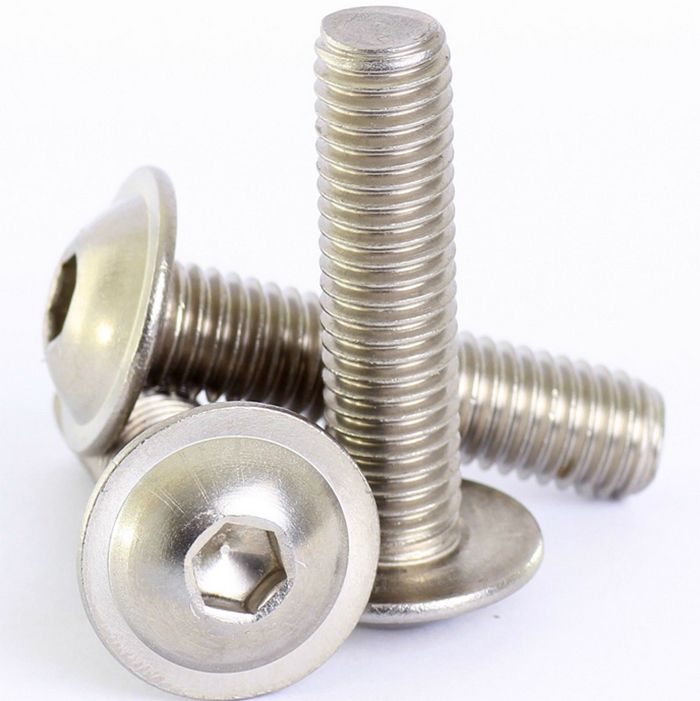 Cheers! /Anders |
|
|
|
Post by racket on Mar 30, 2017 16:25:39 GMT -5
Gotta have nice looking screws ;-)
|
|
|
|
Post by Johansson on Apr 2, 2017 15:41:22 GMT -5
While waiting for some parts for the turbofan build I continue with the JU-02 project, the time has come to construct the test rig! 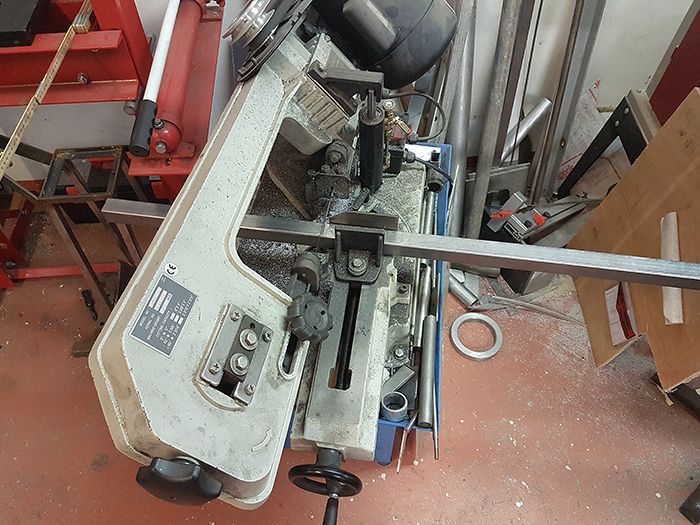 This time I plan to use a load cell to measure the thrust correctly, the "frame tubes" onto which the engine will be clamped have a sliding fit in the test rig so they can transfer the thrust to the load cell.  Four engine mounts have been made from stainless angle iron and nylon feets have been milled that will sit on top of the frame tubes. 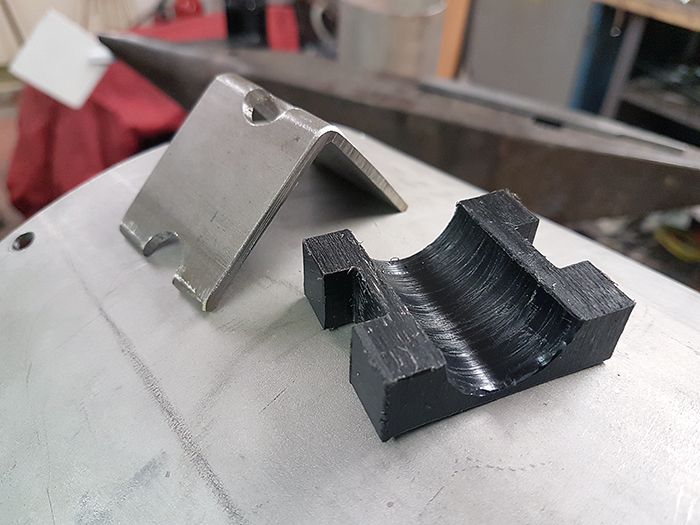 Time to weld the engine mounts in place! 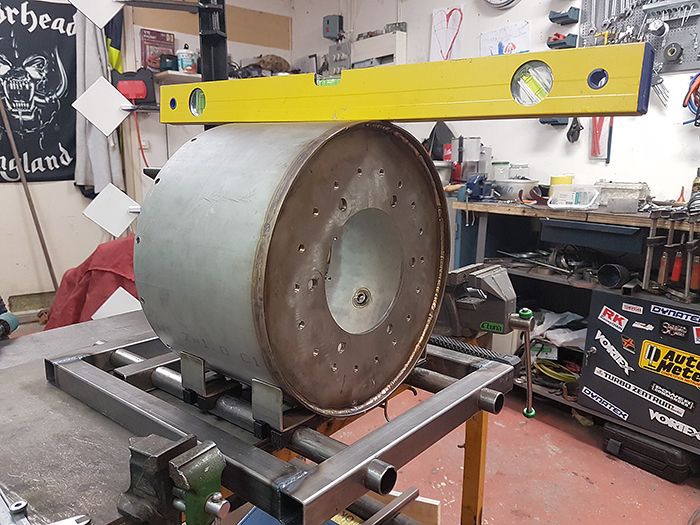 I didn´t weld more than needed to avoid heat distortion of the engine cover. 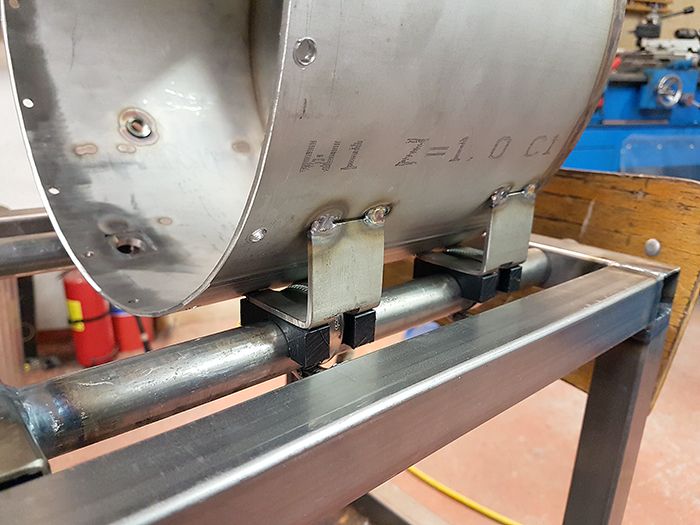 The finished test rig (except for the load cell) with the engine cover fitted, I am planning to mount it to the large fan I will build a motorcycle dyno bench from later. It weighs close to a ton so the engine won´t move it. 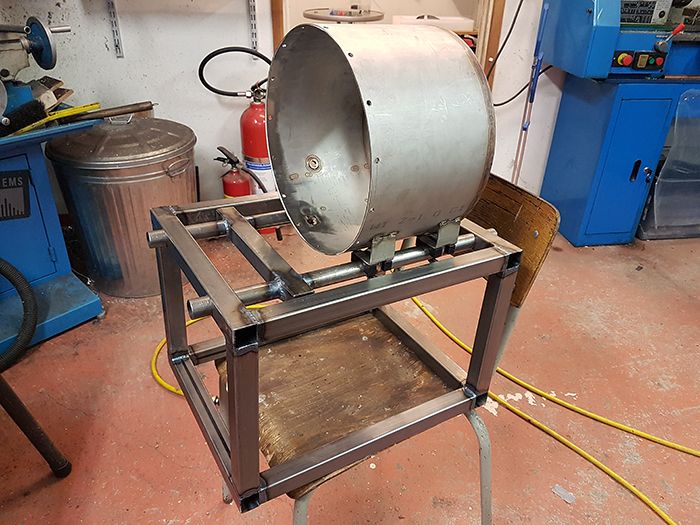 Before calling it a night I wire locked the flame tube screws, no risk that they will fall out now. 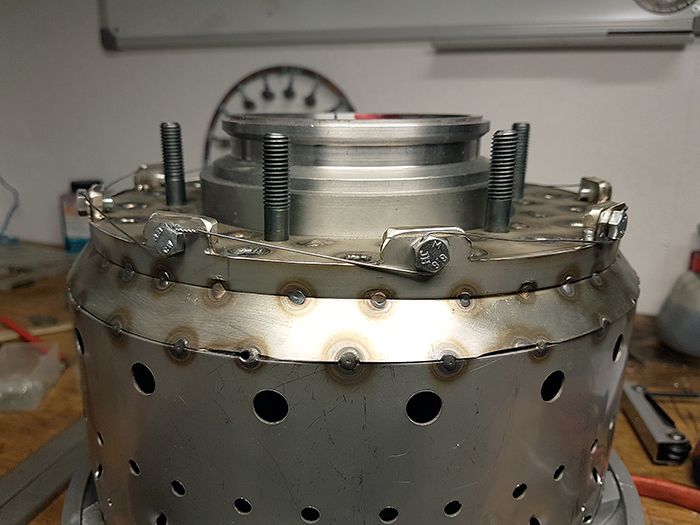 Cheers! /Anders |
|


 visited this site frequently & read all the good progress in here


