|
|
Post by Johansson on Nov 1, 2011 17:34:23 GMT -5
As you can see the coating didn´t stick very well to the galvanized oil lines, I didn´t dare sand blaster them because of the risk of sand getting stuck inside the lines and ending up in the bearings. It was worth a try at least.  |
|
|
|
Post by racket on Nov 1, 2011 19:03:50 GMT -5
Hi Anders
Thats a fine lookin' engine :-)
Cheers
John
|
|
|
|
Post by Johansson on Nov 2, 2011 16:59:17 GMT -5
It sure looks much better than what I expected it to do after it´s maiden run. ;D Today I finished assembling the engine and bolted it to the test bench, fitted the purge system that vents the bottom of the engine cover and adjusted the PWM controller so the throttle wouldn´t be as sensitive as it was during the last test. 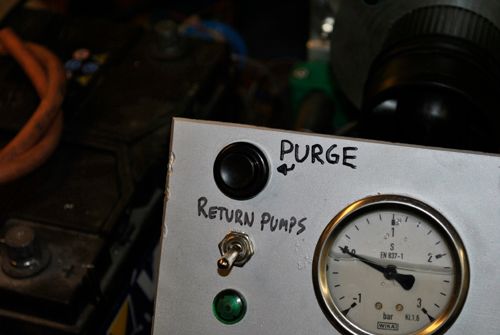 The purge solenoid. 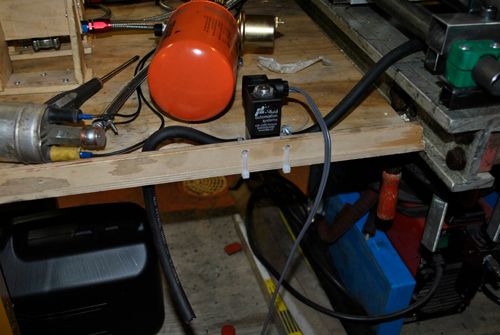 A 1.5mm test injector that I used to adjust the throttle control. 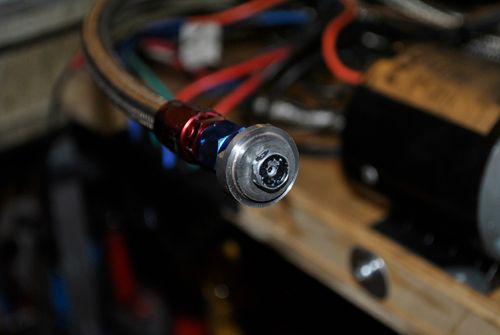 The engine back in the test bench where it belongs. 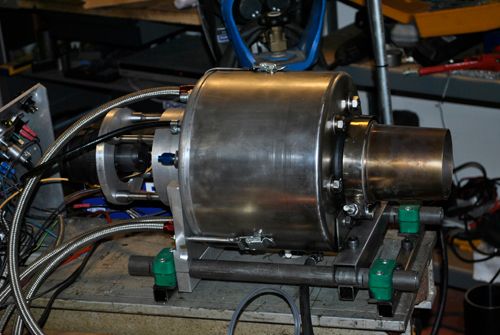 And finally an overview of the mess. 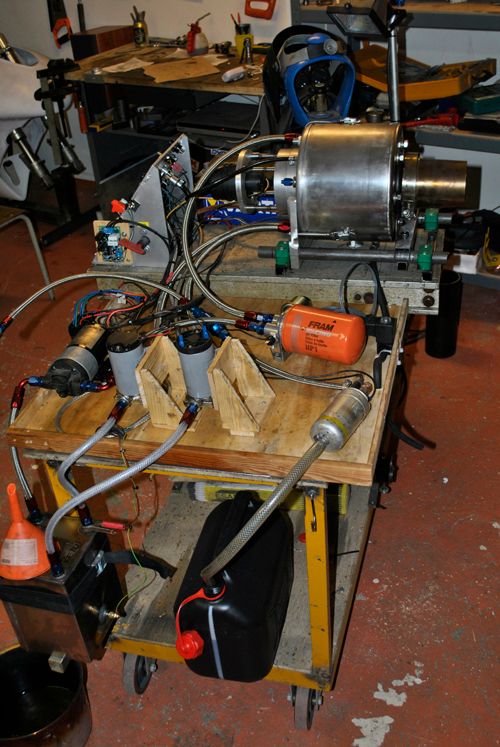 Cheers! |
|
|
|
Post by racket on Nov 3, 2011 23:26:26 GMT -5
Hi Anders
LOL, that "mess" looks rather business like , ..............heh heh , your test stand has "grown" like mine after several additions over the years , I've been meaning to "unclutter" it , but can't seem to be able to workout what stays and what goes, and/or where , so in the end its thrown in the too hard basket.
Your engine gives the appearance of waiting for you to fire her up, ...... they're such patient creatures ;-)
Cheers
John
|
|
|
|
Post by Johansson on Nov 4, 2011 1:04:42 GMT -5
The only thing I regret about the test stand is that it is built on top of my welding bench, so now I have to do all the welding on the floor... I didn´t really plan to make it permanent but as you say it has grown without me noticing it with soldered cables all around the engine so I would need four guys to lift the parts somewhere else, so I guess it has to stay. It is looking very eager indeed, I could almost hear it growling at me this morning when I walked past it. ;D |
|
|
|
Post by Johansson on Nov 4, 2011 17:35:07 GMT -5
I´ve done some thinking about the restrictions in the air intake and decided to remove the preheat fan mount, the fan can just as well be fitted to the test bench instead and that gives the compressor much less restrictions in the air ways. 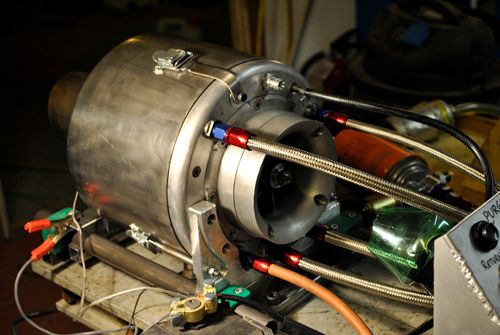 |
|
|
|
Post by racket on Nov 4, 2011 23:36:44 GMT -5
Hi Anders
Good idea at this stage of development just in case the fan/mounts were causing inlet interference , easy to check at a latter date once you have her sorted :-)
Cheers
John
|
|
|
|
Post by Johansson on Nov 5, 2011 7:20:11 GMT -5
Exactly, I can even make a small aluminum bellmouth to fit on the intake in case I feel like it would do any good.
|
|
|
|
Post by racket on Nov 5, 2011 16:44:46 GMT -5
Hi Anders
It probably wouldn't hurt to have a bit more bellmouth on the engine to provide "ideal" inlet conditions for testing to obtain your datum data that can be referred to later once the engine is in the bike in "working" configuration to check if theres been any degrading of performance because of the bike bits .
Cheers
John
|
|
stimps
Member

Joined: August 2010
Posts: 18
|
Post by stimps on Nov 6, 2011 0:30:44 GMT -5
What an awesome biuld! how did i miss this one for so long? This has inspired me more to get into my project! And I threw out all my thread tape. What is the chemical coating called? I might do a few parts on my beast too. Love your machining! Ive been looking at the unused corner of my shop sizing up what Mill I can fit |
|
|
|
Post by Johansson on Nov 6, 2011 0:42:50 GMT -5
I will take some measurements of the comp cover and see if I can find a subwoofer port that fits, way easier than hammering out an aluminum bellmouth in short notice. What an awesome biuld! how did i miss this one for so long? This has inspired me more to get into my project! And I threw out all my thread tape. What is the chemical coating called? I might do a few parts on my beast too. Love your machining! Ive been looking at the unused corner of my shop sizing up what Mill I can fit Good to hear that you like the build, next month I have been at it for two years so it was about time that I got her running. A couple of days ago when I was readying the engine for the next test I remembered a thought that came to me while I was milling out the diffusor housing, it was that if I ever get this piece of aluminum to self sustain it would be the greatest achievement in my life so far. When I, 1.5 years later, did get her running it was more like -"Sweet, but let´s get this sorted out so I can start on the power turbine. That would be something to tell Mom about!". ;D You just never have perspective enough to appreciate things while you are in the middle of it |
|
|
|
Post by Johansson on Nov 6, 2011 0:45:27 GMT -5
What is the chemical coating called? I might do a few parts on my beast too. Love your machining! Ive been looking at the unused corner of my shop sizing up what Mill I can fit It is called TurboX and is sold by www.weirdperformance.se, just as easy to apply as ordinary spray gun paint. Every man needs a mill, preferably with digital scales. Go for it! |
|
stimps
Member
Joined: August 2010
Posts: 18
|
Post by stimps on Nov 6, 2011 0:55:51 GMT -5
I meant to ask you, and I have sifted thru all 38 pages once, tho may have missed it. What turbo are your internals from? Or can you tell me what diameter is your inducer/turbine?
what is the ratio between the surface area of your compressor to your turbine surface area?
cheers.
|
|
stimps
Member
Joined: August 2010
Posts: 18
|
Post by stimps on Nov 6, 2011 0:57:13 GMT -5
Hrmm, im in Australia, so will have to seek the aussie equivilent. John do you know?
|
|
stimps
Member
Joined: August 2010
Posts: 18
|
Post by stimps on Nov 6, 2011 1:04:37 GMT -5
So true. However, I am sad to admit, that my project is now entering its FIfth year. No self sustain just yet LOL. Due to my work as a Lighthouse technician for 4 years travelling around australia I was forced to let the work slide alot. Now I have a local shift job in a casually paced factory environment which is much more understanding of this type of thing! I am mostly looking forward to casting my next two peices to finish off the primary biuld, and then hooking her up to the ECU for the first time and getting a few sensor inputs up and running. I noticed with your biuld, the difference in gas generator size to power take off turbine size is bigger than any other biuld Ive seen. Will this be a problem? or will you just size the gearing to siut? Im assuming you will be putting in nice stator guide vanes to make the most of the energy in the gas flow? |
|


