|
|
Post by racket on Aug 17, 2014 2:23:55 GMT -5
Hi Anders
LOL............heh heh , you probably did , lots have happened in the mean time :-)
So theres a tapered section in the exducer shroud downstream of the exducer to the V band flange ??
If there is a slight reduction in area it will act as a nozzle and speed up the gases after exiting the exducer , this isn't a problem as theres a diffusing process once past the flange and on the way to the freepower .
Looking forward to the next spoolup tests temperature numbers.
Cheers
John
|
|
|
|
Post by Johansson on Aug 17, 2014 2:29:36 GMT -5
After digging through the memory I did this mostly because the bolt circle on the NGV holding the turbine housing in place didn´t allow for a larger diameter v-band flange than what I have now, the curse of making up drawings as I build the engine. I sort of excused this reduction in area with the fact that the hub area almost equals the area reduced by the 4" diameter flange. I can see that it is bad to first reduce the area before opening it up in the freepower duct only to reduce it again in the NGV section, but I have to work with what I have. Something to make better in the MK2 version of the engine.  |
|
|
|
Post by racket on Aug 17, 2014 3:30:21 GMT -5
Hi Anders
The V band I use for my jetpipe connection is a common Garrett one used to hold the turb scroll onto the centre housing of their large frame truck turbos .
Yep the reduction will be pretty close to the hub area , only a few millimetres in it, she'll be right, ...... we'll make an allowance for it with your temperatures :-)
Cheers
John
|
|
|
|
Post by Johansson on Aug 17, 2014 12:43:05 GMT -5
Great news John! Today I made the pitot tube so now everything is set for the upcoming test, I´ve even filled up the scuba tanks. 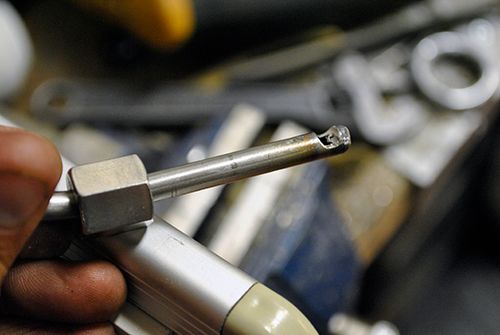 I used a 6mm 316 stainless tube reaching 2cm into the tube, I left a length of tube on the outside so the rubber hose would have a chance of surviving the heat. 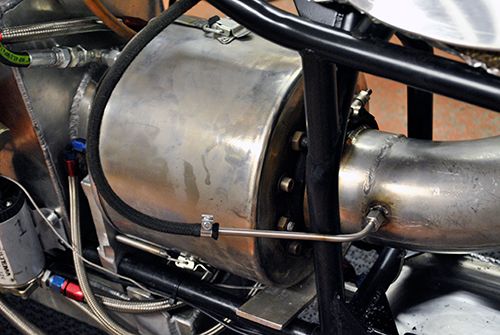 And here is the gauge, ready for action! If the weather clears up I can do a test during the first part of the week, on thursday I will go to Tierp to watch the dragracing EM event! 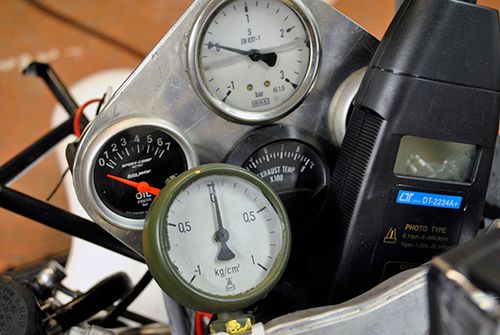 Cheers! /Anders |
|
|
|
Post by racket on Aug 18, 2014 4:19:06 GMT -5
Hi Anders
All ready to fire up :-)
Heh heh , that instrument panel is getting a bit crowded ,.................can't have too many instruments , will you be running the camera on them ??
Cheers
John
|
|
|
|
Post by Johansson on Aug 18, 2014 7:20:24 GMT -5
Hi John, I have one more pressure gauge to fit, I have a digital high performance one at work that I will borrow and measure the pressure in the air box with. I will use the Gopro camera to record everything so I wont have to write it down on paper, much easier and I get readings on every possible rpm setting. Hi Anders All ready to fire up :-) Heh heh , that instrument panel is getting a bit crowded ,.................can't have too many instruments , will you be running the camera on them ?? Cheers John |
|
|
|
Post by Johansson on Aug 18, 2014 14:38:05 GMT -5
I decided not to borrow the digital gauge since I want to keep it permanently in place on the dashboard, so I moved the pressure gauge I already had on the side of the air box up to the triple tree visible the Gopro camera.  I will be looking for signs of under pressure in the air box, this would indicate that the air box is restricting the incoming air while running the engine stationary. It will be very interesting to go through the video after the run to see if and when the P1 (pressure before the compressor) starts to change, and when I start doing high speed road tests I hope to see slightly higher pressure thanks to the ram air. 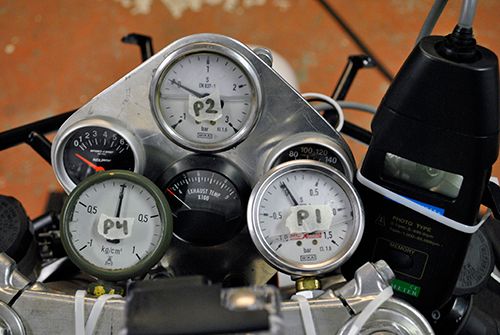 Cheers! /Anders |
|
|
|
Post by ernie wrenn on Aug 19, 2014 18:51:04 GMT -5
Damn....love it!
|
|
|
|
Post by smithy1 on Aug 19, 2014 20:17:50 GMT -5
Hi Anders,
Great work..! A question if I may....I see you're using one of the reflective type tachometers, can you please tell me how you have the pick-up mounted in the compressor housing, or have you just got it pointing at the wheel?? A photo or two would be greatly appreciated.
I'm thinking of using a similar method for the 6041 "Beast".
Cheers,
Brett.
|
|
|
|
Post by Johansson on Aug 19, 2014 23:01:22 GMT -5
Thanks Ernie! Hi Anders, Great work..! A question if I may....I see you're using one of the reflective type tachometers, can you please tell me how you have the pick-up mounted in the compressor housing, or have you just got it pointing at the wheel?? A photo or two would be greatly appreciated. I'm thinking of using a similar method for the 6041 "Beast". Cheers, Brett. Hi Brett, great to see you back in business here. I have only pointed the diodes at the wheel, one of the blades is painted white which is enough to give a good signal. It is very difficult to get a good picture of it since the front forks get in the way of the camera, but here is one that shows pretty well how it is done. I can take a couple more if you want me to. 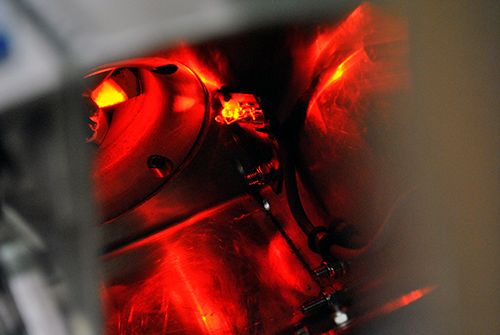 |
|
|
|
Post by smithy1 on Aug 20, 2014 3:35:40 GMT -5
Thanks Anders, All understood....more photos won't be necessary, I just needed an idea of what's required.....I plan to do the something similar to the GT6041 powered "Green Beast"..! It's an ideal way to read rpms for our machines with an "off the shelf" item...a cheap tacho like the one you have from fleabay can be had for less than $15..!
Excellent work Sir.
Cheers,
Smithy.
|
|
|
|
Post by Johansson on Aug 20, 2014 15:26:39 GMT -5
Good to be able to help, the cheap china tachos is a blessing for one like myself who hates electronics. Just move the diodes and you are ready to go. Here is a picture from my job today, we are overhauling the Siemens SST500 steam turbine and the system is scheduled to be tested on tuesday. I know some guys who have to work all weekend, fortunately I finished my job with the safety and throttle valves today so tomorrow I am off to watch Top fuel dragracing and drink beer.  Will get back to the bike start next week after I´ve rested some. Cheers! /Anders |
|
|
|
Post by smithy1 on Aug 20, 2014 16:06:57 GMT -5
Hi Anders,
Impressive looking steam turbine..!
I watched your bike videos last night....excellent work indeed...!
You like Top Fuel Dragsters eh??...I crewed on several of them here in Sydney for ~7-8 years on & off...They're silly machines really, ~7000hp+ & drinking ~8 liters of nitro per second..! Listen closely when they go into the first stage light, you'll hear them go onto full fuel delivery, the sound changes significantly. Also listen closely to them as they go down the track you can just tell when each phase of the hydro-pneumatic/centrifugal clutch is engaged as the rpm fluctuates slightly..they "should" be on full clutch lock-up by around 1/2 track if running the full 1/4 mile.
When standing behind them on the start line, we used to get "rained on" by all the unburnt nitro from the exhaust...how they run with an air/fuel ratio of just 1.8:1 is beyond me..! I guess running twin spark plugs at 44amps in each cylinder helps..!
Cheers,
Smithy.
|
|
|
|
Post by smithy1 on Aug 24, 2014 20:19:32 GMT -5
Hi Anders,
Any progress..? I've been following your bike thread with interest. What mods have you had to make lately?? Watching your video you seemed to have slightly high EGT's, not dangerous but getting up there.
Cheers,
Smithy.
|
|
|
|
Post by Johansson on Aug 25, 2014 14:18:28 GMT -5
Hi Smithy! I am mostly interested in Pro Modified but Top Fuel isn´t exactly boring to watch either. No progress since the last update, the bike is ready for a test as soon as I can find some time to do it. I am still recovering from an awesome weekend at Tierp Arena, little sleep and lots of beer takes its toll... I haven´t really done any mods other than remove the freepower and fit a straight exhaust pipe with pressure and temp gauges, the test will give me some valuable data with which we should be able to figure out why the temps are a bit high. Cheers! /Anders |
|


