|
|
Post by racket on Jul 2, 2012 21:34:06 GMT -5
Hi Anders
Nice thick containment rings :-)
Cheers
John
|
|
|
|
Post by stoffe64 on Jul 3, 2012 1:33:25 GMT -5
very nice friends you have there Anders, just cut out those rings for free, fantastic!  |
|
|
|
Post by Johansson on Jul 3, 2012 15:13:35 GMT -5
Last night I spent 5 straight hours in front of Olovs lathe to make the turbine housing from the two steel rings, my bench lathe was not exactly up for the job...  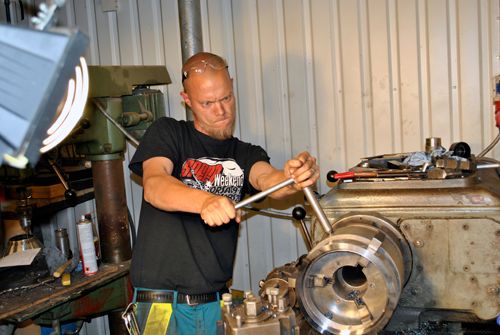 After trueing the NGV part of the two-piece turbine housing I cut the seat for the turbine wheel and test fitted it to find the right depth. 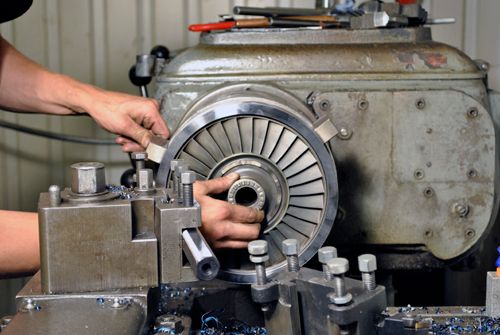 After that I finished up the outside and made a V-band flange on the rear end. 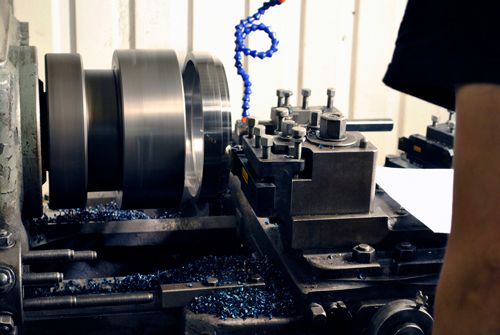 Here is the finished NGV housing cooling down after some heavy cutting.  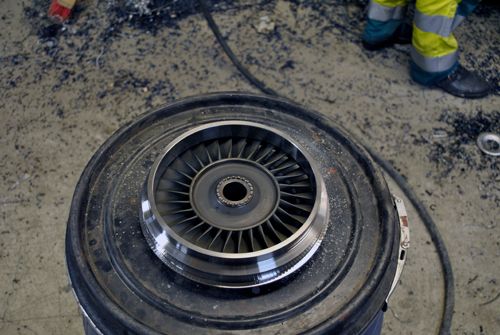 Time to start working on the second piece where the alignment brackets will hold the turbine housing to the power turbine shaft tunnel , the exhaust duct will also be fitted to this piece. Lucky me to have my own beard-scratcher so I have both hands free to work the lathe! ;D  Here I am making the final cuts to the piece.  After an entire evening with the lathe this is how happy ( and dirty) one is! 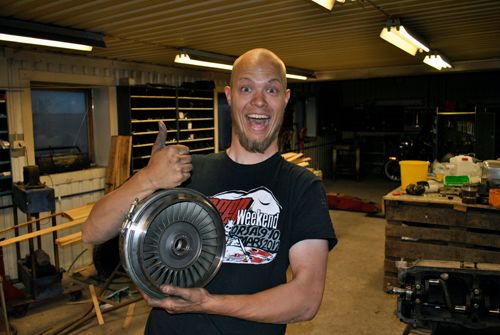 A closeup on the side of the housing closest to the gas producer, in front of the turbine wheel I will fit the nozzle guide vanes made from 2mm thick stainless tube segments. An inner steel ring will hold a central guide cone that will steer the jet exhaust towards the power turbine blades. 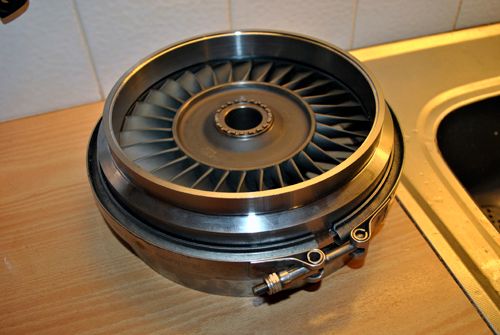 The other side of the housing, just after the step-up in outlet area there will be some sort of brackets that centers the housing around the turbine wheel and holds it to the shaft tunnel which in turn will be securely bolted to the gearbox. You can also see the 2mm edge on the outside where the exhaust ducting will be fitted. 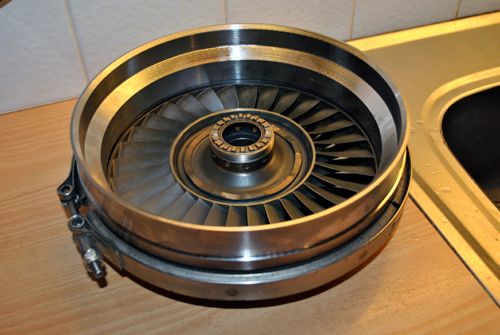 The entire turbine housing will be sand blasted and coated with cheramics later, it should survive just fine with the lowish temps in the power turbine compared to the gas producer NGV. A very productive evening indeed, next up is to make the steel ring and NGV vanes as soon as I get the material I´ve ordered for it. Cheers! /Anders |
|
|
|
Post by racket on Jul 3, 2012 17:03:33 GMT -5
Hi Anders
Now thats a nice sized lathe :-)
Parts are looking good
Cheers
John
|
|
|
|
Post by pitciblackscotland on Jul 3, 2012 19:10:32 GMT -5
Hi Anders, Always handy if you know someone who has a bigger lathe than you have. Awesome work on those parts.  Cheers, Mark.. |
|
|
|
Post by Johansson on Jul 4, 2012 13:37:12 GMT -5
Thanks guys! It is great to be able to borrow Olovs lathe since a lathe this size would fill up my entire workshop... |
|
|
|
Post by Johansson on Jul 4, 2012 14:58:31 GMT -5
I made a quick mockup of the gas producer, transition cone and power turbine housing just now, I think it will look pretty sweet once the exhaust duct and gearbox are in place. 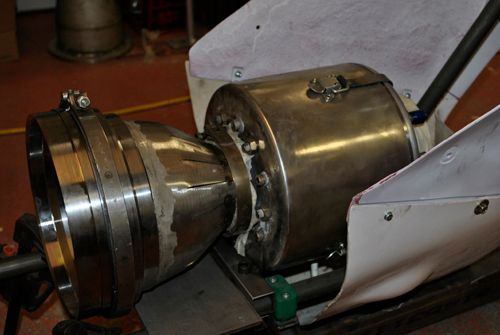 As you might remember I considered making an ordinary straight walled cone between the engine and PT, but looking at the mockup this one gives the engine a nice "organic" look so it is a keeper.  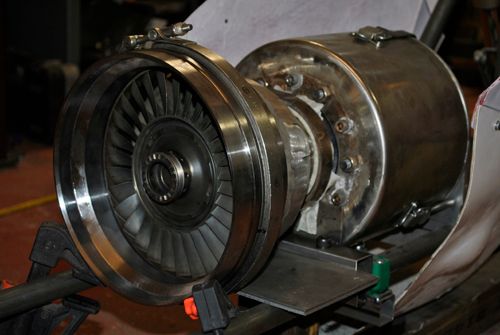 Cheers! /Anders |
|
|
|
Post by racket on Jul 5, 2012 1:31:01 GMT -5
Hi Anders
LOL, the freepower looks too big for that "little" gas producer ;-)
Cheers
John
|
|
|
|
Post by Richard OConnell on Jul 5, 2012 1:39:09 GMT -5
it really does.
|
|
|
|
Post by Johansson on Jul 5, 2012 14:15:44 GMT -5
He he, the gas producer looks like my little Pegasus turbine compared to the freepower. If I used a TV94 turbocharger and an oversized can combustor instead it wouldn´t look as small though... |
|
ashpowers
Veteran Member

Joined: February 2011
Posts: 207
|
Post by ashpowers on Jul 6, 2012 8:15:32 GMT -5
Wow - I step away for two weeks and come back to this! Great work Anders!
... getting my new NGV ring today! They re-made the part for me! =)
|
|
|
|
Post by Johansson on Jul 6, 2012 10:00:14 GMT -5
Thanks Ash! Great that they admitted that they messed up the NGV ring and made a new one for you, looking forward to some progress pics on your engine build! =)
|
|
|
|
Post by Johansson on Jul 8, 2012 6:49:47 GMT -5
I made some more progress on the drawing today, without knowing how the gearbox will look like I cannot draw up the transition between the shaft tunnel and gearbox so I will have to wait for the german company to get back to me. i231.photobucket.com/albums/ee196/Anders811017/Anders%20projekt/Johansson%20Unit%2001/JU-01kraftturbinritning1.jpg(for some utterly strange reason I cannot post the pic here, it just says that the image has been moved or deleted)  The next project is to build a small furnace for aluminum melting, I will cast the blank for the shaft tunnel myself instead of just buying a chunk of aluminum so I can learn more about the noble art of sand casting. 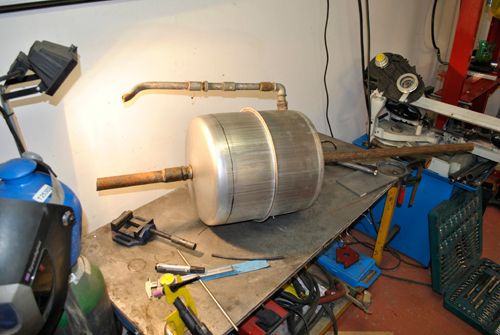 |
|
metiz
Senior Member
Joined: April 2011
Posts: 297
|
Post by metiz on Jul 9, 2012 10:29:35 GMT -5
Hey Johansson If you're going to cast aluminium, go to the scrapyard to find some and save some cash. Only get aluminium that has already been cast so you know you have the right kind. (carterhalves, doorhandles, shit like that. You build is awesome so far. The mockup a couple posts above is pure art |
|
|
|
Post by Johansson on Jul 9, 2012 16:54:56 GMT -5
Thanks Metiz! I have scavanged lots of scrap aluminum that I can use, no cast parts unfortunately but I can add some additives to the melt to compensate for it. 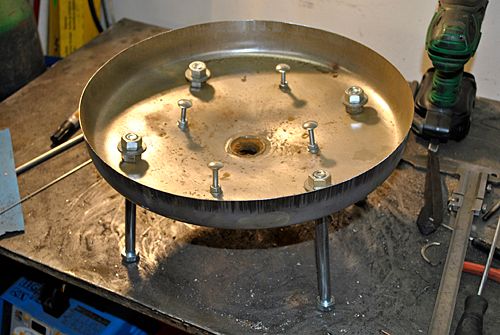 I started building the furnace today, tomorrow I should have time to cast the bottom of the furnace. 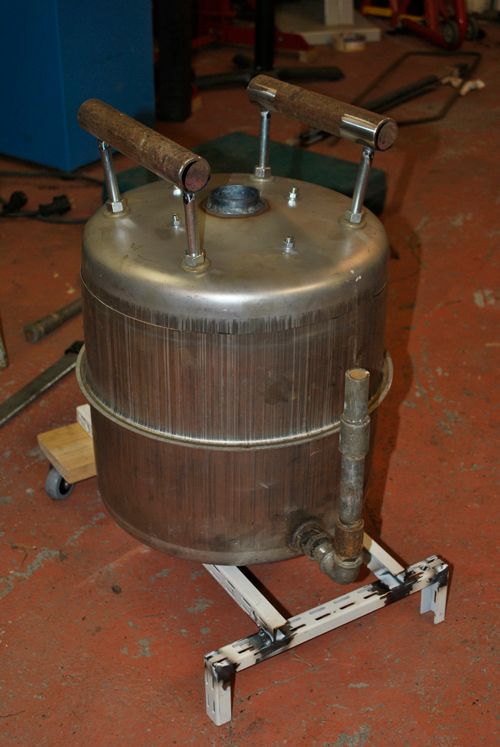 25 kg of fire clay and a pile of fire proof bricks just waiting to be put to use! 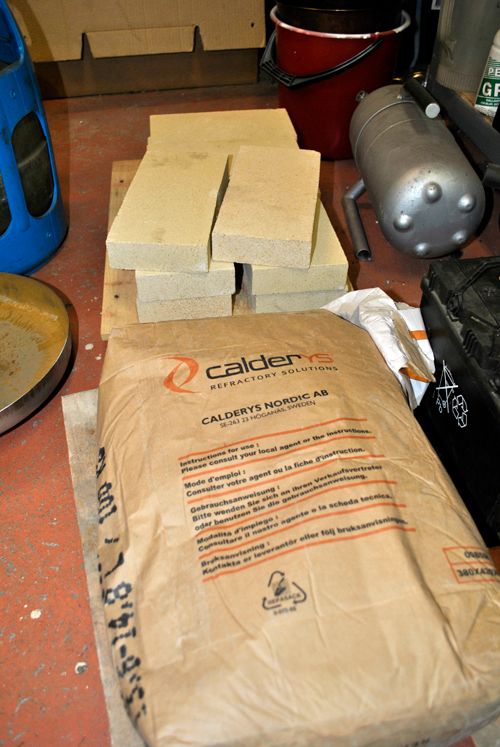 Cheers! /Anders |
|


