|
|
Post by Johansson on Nov 8, 2012 12:25:04 GMT -5
Thanks guys! John, that would have been a good idea. It is easy to mark the wheel with a sharp knife so it is fitted to the shaft the same way every time so it is no cow on the ice as we say here in Sweden.  |
|
jayakod2
Member

Joined: November 2012
Posts: 20
|
Post by jayakod2 on Nov 8, 2012 13:19:36 GMT -5
hi anders
nice work u done hear.
i am watchin ur progress update every day
and i also trying to make my own turbines
|
|
|
|
Post by Johansson on Nov 8, 2012 14:12:07 GMT -5
hi anders nice work u done hear. i am watchin ur progress update every day and i also trying to make my own turbines Hi and thanks! If you are building an engine you should start a build thread here, people here are very helpful in case you get stuck on a problem or just need to bounce some ideas at us. |
|
|
|
Post by racket on Nov 8, 2012 15:01:25 GMT -5
Hi Anders
Heh heh ,........... I was trying to make mine absolutely idiot proof when I arranged my curvic that way :-)
Yeh , no problems with using a matching set of small grind mark like we do with the gas producer comps .
Cheers
John
|
|
sven
Veteran Member
Joined: February 2012
Posts: 102
|
Post by sven on Nov 8, 2012 15:06:39 GMT -5
Nice work as always Anders, thumbs up!
Sven
|
|
nersut
Veteran Member
Joined: September 2012
Posts: 223
|
Post by nersut on Nov 9, 2012 2:16:50 GMT -5
Nice job Anders! I just got my new Allison 250 3rd Turbine Wheel from eBay that I am going to build onto my FJK-2. But it might take a while before I call my engine a Turboshaft.  Cheers Erik |
|
|
|
Post by Johansson on Nov 10, 2012 10:54:44 GMT -5
Thanks! Keep up the good work on the FJK-2 Erik, it will be one hell of an engine once converted to shaft power! |
|
|
|
Post by Johansson on Nov 11, 2012 17:22:05 GMT -5
I made a crude drawing of the coupling between the gearbox shaft tunnel and the power turbine housing this morning. 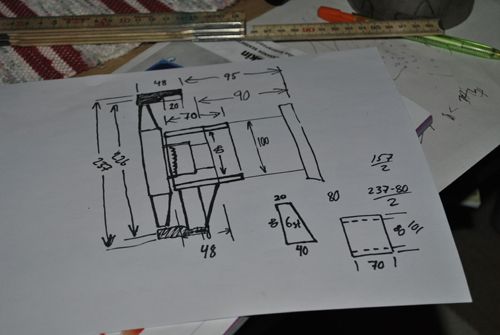 Later this evening I headed to the shed to actually build it, I started off with a 70mm long piece of ss2343. 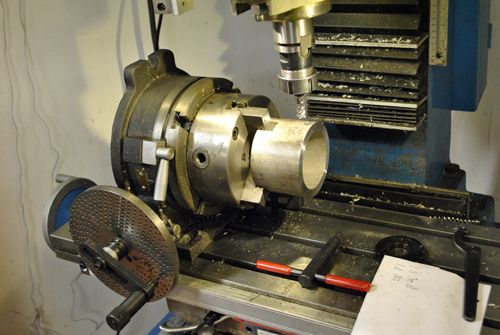 Drilling a bolt circle for 6 M8 bolts, they will hold the piece in place on the shaft tunnel where it will sit in a recess made on the lathe later. 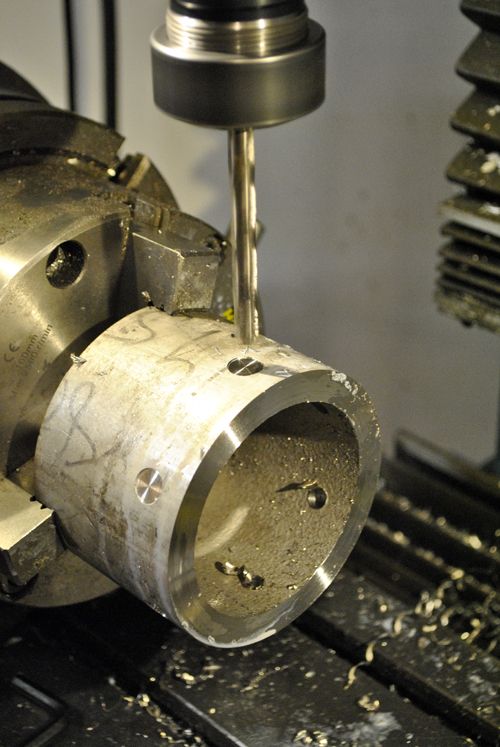 After the holes were drilled I turned the part around and milled 6 30mm long slots, you will soon see what for. 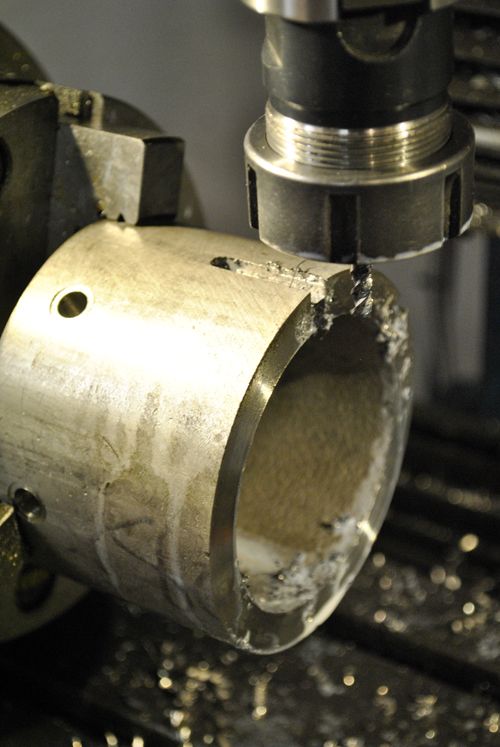 This is the finished part, sorry for the fingerprints.  After that I cut out 6 wings from a sheet of 6mm thick ss2333, they will connect the gearbox to the power turbine housing. 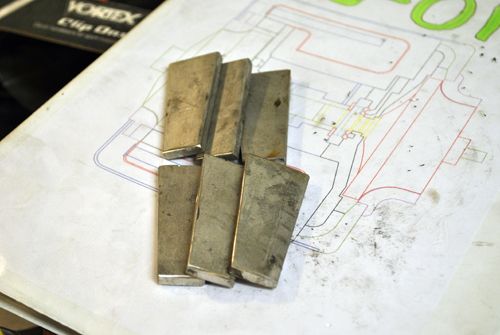 Spot welding them in place. 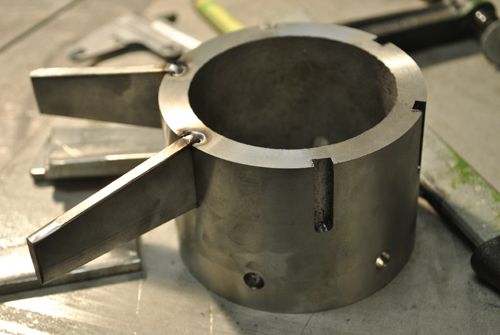 After some adjustments they were welded in place. 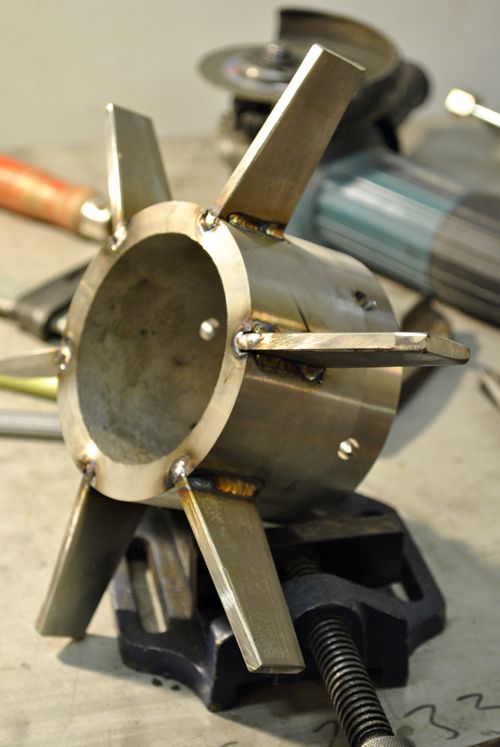 Here the part is in place in the rear half of the power turbine housing ready to be welded. 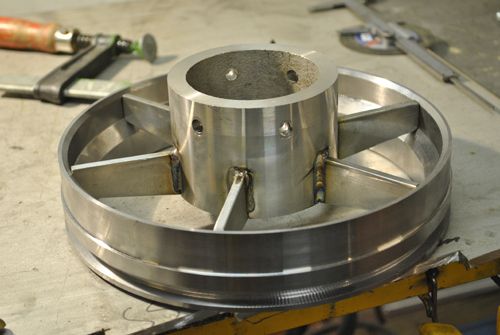 And here they are cooling off after being tigwelded, the allignment is not critical at this point since I will borrow Olovs lathe to open up the hole in the centre piece. This way it will be perfectly centered in the PT housing and with the shaft tunnel turned down to the same diameter the two will have a snug fit and the power turbine wheel will be centered in it s housing. Easy peacy! 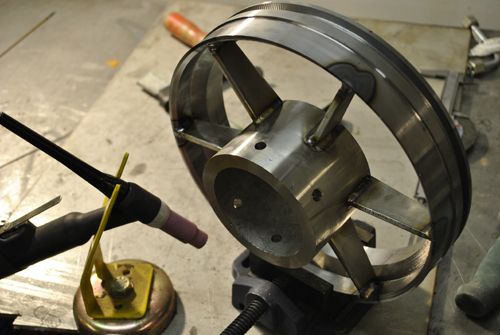 Cheers! /Anders |
|
|
|
Post by racket on Nov 12, 2012 3:22:12 GMT -5
Hi Anders
Love that shiny stainless :-)
Cheers
John
|
|
|
|
Post by stoffe64 on Nov 12, 2012 12:58:50 GMT -5
yeahh,i love shining stainless as well, very nice work Anders!!
|
|
|
|
Post by Johansson on Nov 13, 2012 14:04:29 GMT -5
Stainless is nice, especially the easier kind (ss2333 and ss2343) that can be machined without special tools. Last night I visited Olov and borrowed his Köping lathe to do the last few cuts needed to fit the angle drive and power turbine housing together. 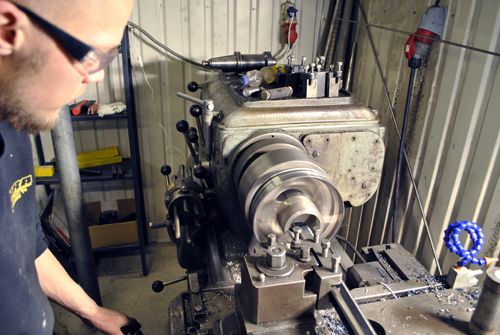 First I took some cuts out of the centre piece on the PT housing to centre it perfectly in the housing, I had this in mind when I welded it together without any jigs or serious measurements. Much easier this way. 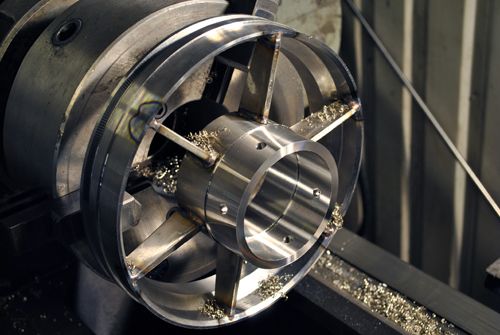 I had to assemble the primary shaft with ball bearings, shims and turbine wheel spacer several times during the evening to take measurements so everything would come out the way I wanted. No real drawings were made as usual so I sort of improvised my way through the build, much more fun that way! 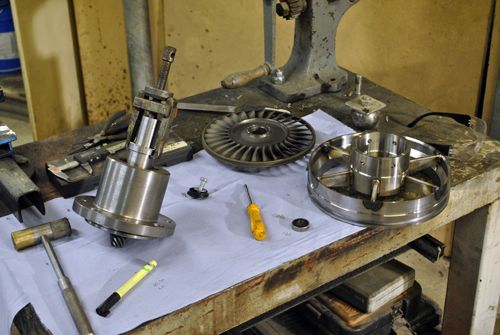 Taking down the shaft tunnel to the same diameter as the centre piece of the PT housing, bolt circle will be drilled and threaded later in my mill. 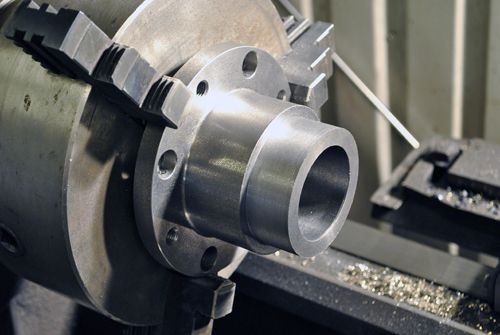 Now it was time to assemble everything starting with the shaft tunnel and PT housing. 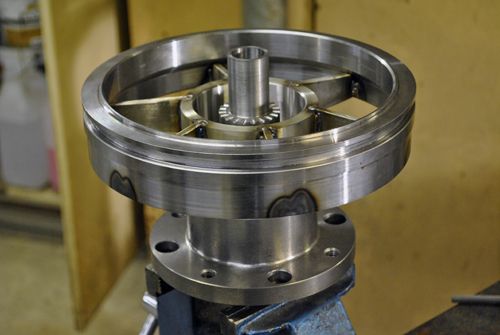 Then I installed the Allison C20 turbine wheel. 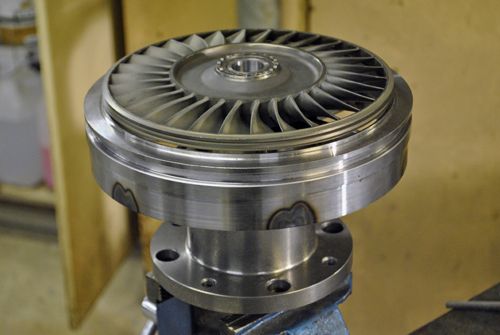 With the wheel in place I could fit the front half of the housing and torque it together, everything turns freely without any wobble or clearance problems at all so I am happy! 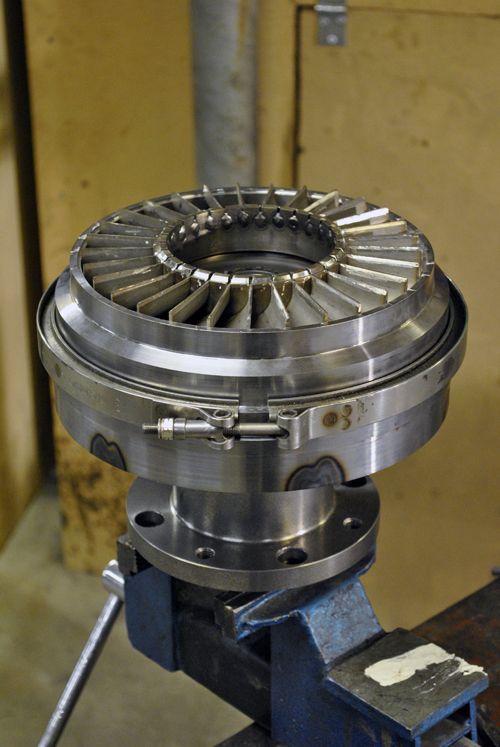 The other side. Turbine wheel clearances are on the generous side to allow for expansions from heat and revs, I rather lose a HP or two than risk to ruin the turbine wheel if it would rub the housing. 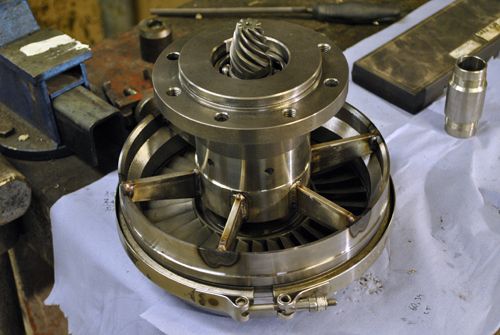 Back home in my workshop again I assembled the gearbox and arranged it in my frame jig to see how it turned out, I wonder how many 100´s of turns I will spin the freepower section by hand with a stupid smile on my face... 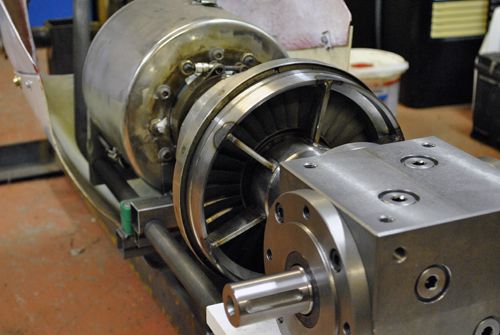 Cheers! /Anders |
|
|
|
Post by stoffe64 on Nov 13, 2012 14:11:05 GMT -5
HELVETE Anders.....IM stunned by your maching work, you are very good at that, looking really proffessional!!
cheers/stephan
|
|
|
|
Post by Johansson on Nov 13, 2012 14:18:45 GMT -5
Thanks Stephan, many hours in the workshop finally starts to pay off on the results. I will bead blast the parts and coat the exposed areas with cheramics later, it should look even better after that. |
|
|
|
Post by racket on Nov 13, 2012 16:39:08 GMT -5
Hi Anders
Now that's a fine looking gas turbine bike engine :-)
Heh heh , you'll be wanting to burn kero in her to spin that output shaft before too long .
Cheers
John
|
|
rythmnbls
Veteran Member
Joined: August 2011
Posts: 145
|
Post by rythmnbls on Nov 13, 2012 20:26:53 GMT -5
Beautiful work Anders, looking forward to seeing a chain and sprocket on that output shaft Regards, Steve. |
|


