|
|
Post by racket on Jan 6, 2012 15:48:42 GMT -5
Hi Anders
Top job .........not a lot more to do before feeding in some fuel :-)
Cheers
John
|
|
|
|
Post by Johansson on Jan 6, 2012 16:12:20 GMT -5
Hi John, Nope, building rocket engines is a walk in the park compared to gas turbines. Can´t understand how them NASA guys keep themselves occupied during job hours.  |
|
|
|
Post by racket on Jan 6, 2012 19:14:39 GMT -5
Hi Anders
LOL......they fill in the time telling each other how awesome they are ...... "pissin' in each others pockets" as we'd say here in Oz ;-)
Cheers
John
|
|
|
|
Post by Johansson on Jan 7, 2012 16:56:47 GMT -5
Ha ha, hope they aren´t reading this because then any future employment is in serious danger... ;D I finished the engine mounts today, all that is left to do is to make an aluminum plate that the two mounts are bolted to.  I used my largest hole saw to make a hole where the engine would be, notice the two copper washers that sets the clearance between the two halves once the engine is in place.  Then I used my line boring tool to open the hole up from 67mm to 80mm, a true must have item for all you mill owners out there!  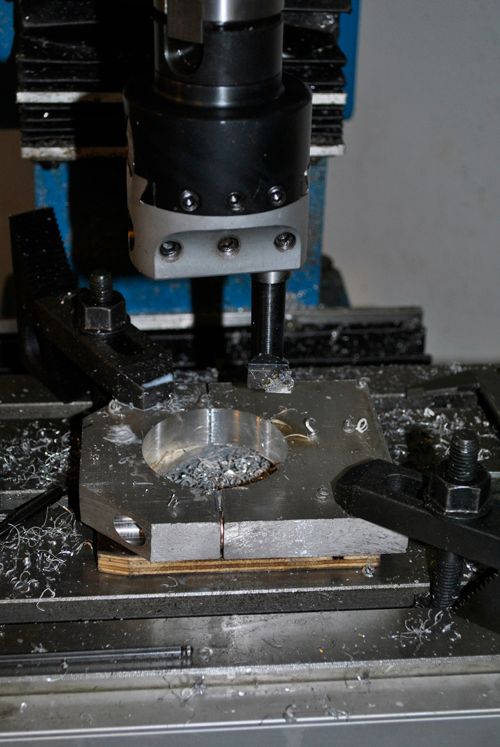 Pic taken just after the last cut, then I did everything all over again with the second mount and finished them off on the belt sander. 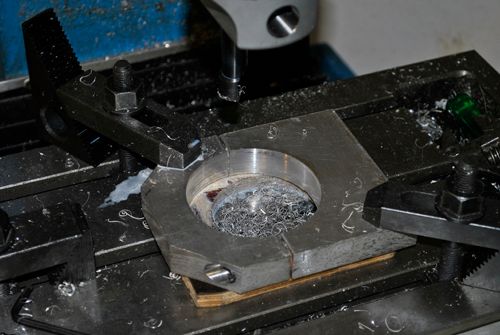 Here the mounts are fitted to the engine, like a glooooove!  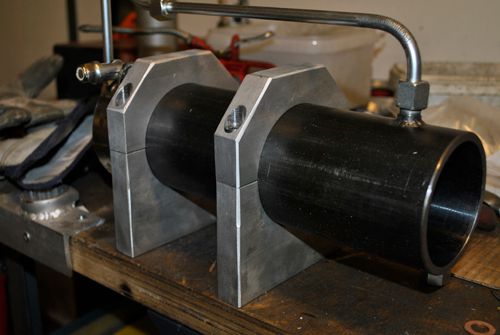 The rocket engine is actually upside down on the pic, it will be suspended from above so I will have better access to the feed lines and injector plate.  No 1000N will ever tear this engine from its mounts, I promise you that! ;D Cheers! |
|
|
|
Post by racket on Jan 7, 2012 23:32:12 GMT -5
Hi Anders
A fine pair of mounts :-)
Cheers
John
|
|
|
|
Post by Johansson on Jan 8, 2012 15:26:51 GMT -5
Thanks!  I tried to rotate the injector plate and housing so that the engine can stand as it does on the pics above with the feed lines pointing to the side instead of down, no problems at all (need to keep the fuel inlet hole in the injector plate at the highest point) so I think I´ll mount it that way instead of hanging upside down. |
|
|
|
Post by Johansson on Jan 9, 2012 17:10:38 GMT -5
Here is a pic of the now rotated engine housing, much better this way and it will be way easier to make the matching engine mount on the test bed/gocart/whatever. 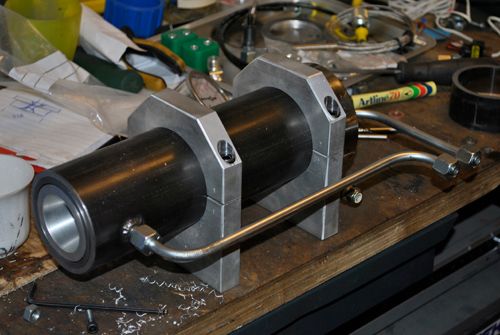 And here is the gauge that measures the combustion pressure fitted to the engine, only a 16bar gauge so I might have to get a new one for higher pressure later. It sucks though that the next step for standard gauges is 50bar... 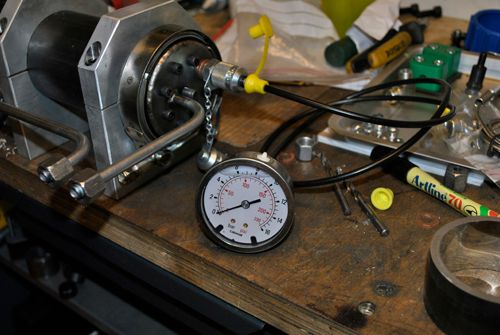 I also made a test coupling for the methanol injector, I drilled and tapped the feed hole with an M7 thread and made a coupling that fits directly to an 8mm hydraulic steel pipe. 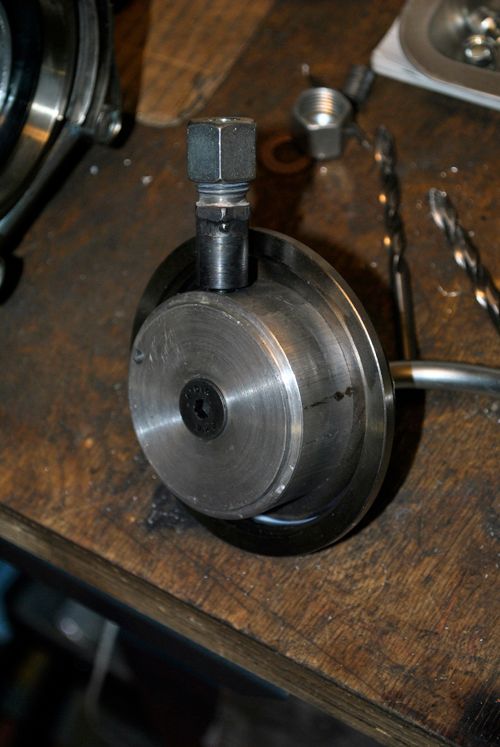 Next up is to make a pressure tank for water and fit connections to the shop air compressor and for the 8mm hydraulic pipe to the engine, it will be very interesting to start doing some injector tests!  Cheers! |
|
mator
Junior Member
 
Joined: January 2012
Posts: 76
|
Post by mator on Jan 16, 2012 14:34:12 GMT -5
Hi John, Nope, building rocket engines is a walk in the park compared to gas turbines. Can´t understand how them NASA guys keep themselves occupied during job hours.  Your words are mean: you can make engine that will successfully power flying rocket? ;D |
|
|
|
Post by Johansson on Jan 16, 2012 17:52:20 GMT -5
No, I said building them was easy. Getting the buggers to actually start and run is a completely different matter. ;D
|
|
mator
Junior Member
 
Joined: January 2012
Posts: 76
|
Post by mator on Jan 17, 2012 3:15:05 GMT -5
Ok)))
Now important questions: how do actually fuel components are mixing? What type injectors do you have choosen?
Maybe answer on previos pages, but its quite boring to read them all)))
|
|
|
|
Post by Johansson on Jan 17, 2012 15:19:53 GMT -5
Ok))) Now important questions: how do actually fuel components are mixing? What type injectors do you have choosen? Maybe answer on previos pages, but its quite boring to read them all))) I will use a countersunk bolt head as the fuel injector and a full circle of N2O holes around it, that will hopefully provide good mixing. I´ll test it with air pressure and water first to see how it works. |
|
mator
Junior Member
 
Joined: January 2012
Posts: 76
|
Post by mator on Jan 19, 2012 13:36:10 GMT -5
Ok. Good.
But as I can see on the first picture from bottom of the page you have not already made holes for oxidiser injection?
Or I dont understand smth? For me is quite difficult to imagine construction without drawings)))
And as I understand fuel injector is centrifugal atomizer and oxidizer are spray atomizers?
|
|
|
|
Post by Johansson on Jan 19, 2012 14:47:27 GMT -5
No N2O holes drilled yet, perhaps easiest for you to wait and see how things work out since the only drawings I use are the ones in my head.  I bought an interesting book yesterday, History of Liquid Propellant Rocket Engines. The historic and amateur sections will be of much use to me I think. 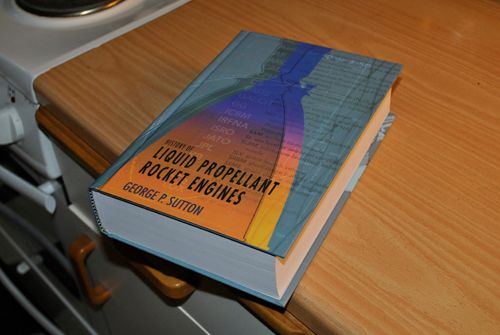 Cheers! |
|
|
|
Post by racket on Jan 19, 2012 18:40:02 GMT -5
Hi Anders
That should provide some interesting reading, keep you busy for a few nights :-)
Cheers
John
|
|
mator
Junior Member
 
Joined: January 2012
Posts: 76
|
Post by mator on Jan 20, 2012 11:02:18 GMT -5
Gut. We will wait for interesting experiments!!! And I hope you make some interesting videouz if you will make some experiments))))
|
|