|
|
Post by Johansson on Apr 11, 2013 6:46:03 GMT -5
Hi Anders Perfect :-) Cheers John Hi John, I hope it will be pretty linear, I used a one way valve on the old ones outlet port so it will be interesting to see how the flow curve looks without it. I think the sudden bump at 2.5cm throttle will be less noticable. I will try to find a mini pressure gauge on Ebay that can be fitted directly to the throttle body, that way I won´t have to have one mounted to the dashboard. Cheers! /Anders |
|
|
|
Post by Johansson on Apr 14, 2013 13:41:08 GMT -5
I´ve spent four hours this weekend on the throttle regulator, now I need to buy some fittings and stop bolts before I can do anything more. 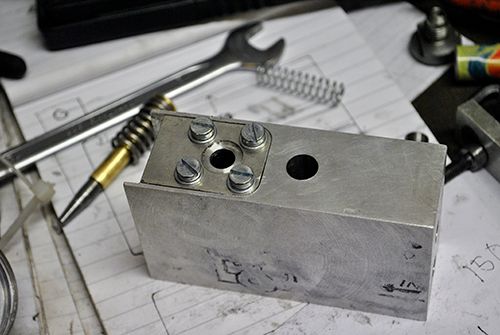 I made a lid for the needle valve and grided the o-ring spacer so the rings got a perfect fit around the needle valve shaft when the lid was in place. 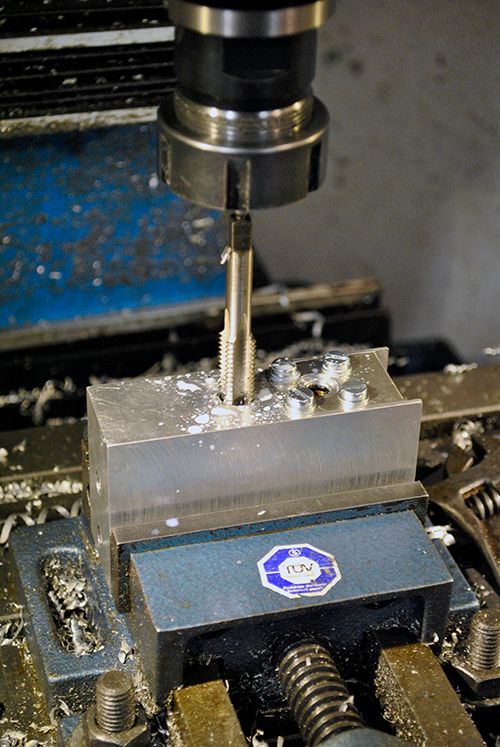 The hole for the pressure relief valve got M12 threads so a bolt can be used to adjust the spring pressure, this way I can adjust the max fuel pressure. 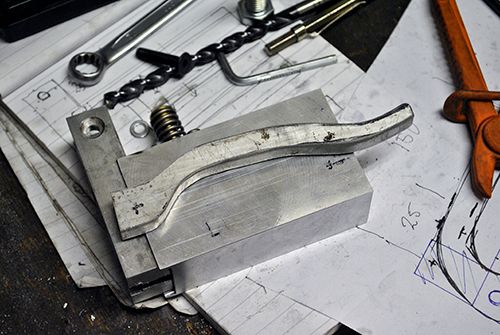 Risking ten of my fingers I freehanded a throttle lever on the circular table saw, the last touch was done with a flap disc on the angle grinder. 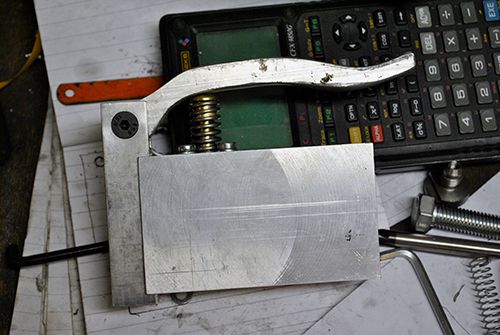 After some fine tuning I got a throttle wire play of 22mm between idle and full throttle, should be enough since I shouldn´t need any finer control of the revs. Cheers! /Anders |
|
|
|
Post by racket on Apr 14, 2013 17:11:29 GMT -5
Hi Anders
Heh heh , we only need idle and full bore ;-)
Does the O'ring produce much drag on the needle ?? ..................I used a small cup seal in my controller as I was unsure about using an O'ring .
I learn a lot checking out your machining methods :-)
Cheers
John
|
|
|
|
Post by Johansson on Apr 15, 2013 0:26:38 GMT -5
Hi John, I remember you discussing your jet bike throttle with someone years ago at the DIYgt forum, the conclusion was that the throttle was unnecessarily advanced and a much cruder one would have worked just as good. Not very much, the spring easily overcomes the O-ring drag. Since the seals are on the low pressure side of the valve seat very little sealing pressure is needed. Feels good to be able to inspire the teacher.  Cheers! /Anders |
|
|
|
Post by racket on Apr 15, 2013 4:17:03 GMT -5
Hi Anders
You do lotsa inspiring ;-)
Cheers
John
|
|
|
|
Post by Johansson on Apr 16, 2013 16:24:02 GMT -5
Good to hear! Today I finished most of the throttle regulator except for the wire mount and some drilled holes for fitting the regulator to the air box, that will have to wait until I get the throttle grip I ordered a couple of days ago. 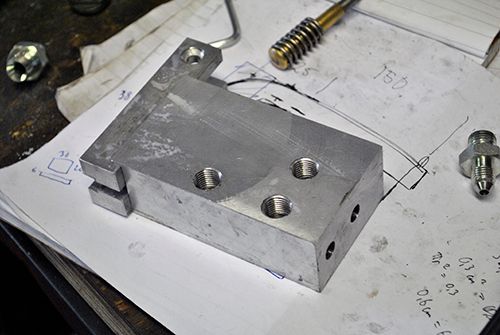 The holes for the fuel ports were drilled and threaded with R1/4" and the holes in the end were threaded to be blanked off. 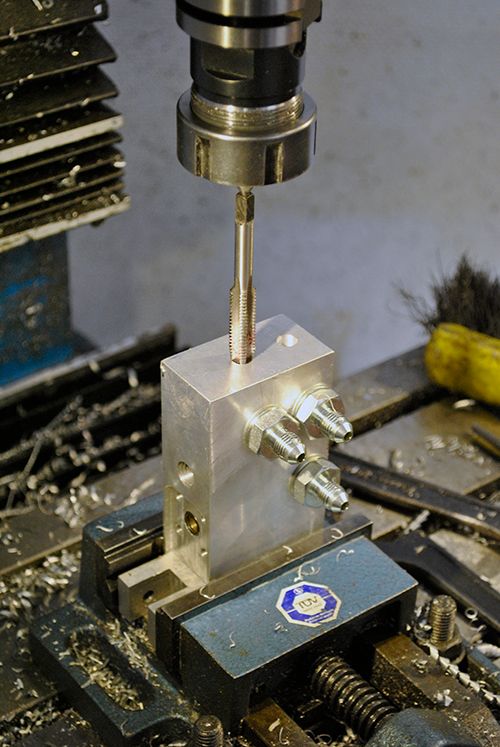 With the holes blanked off and JIC 7/16" couplings fitted (same as AN4) the regulator looks like this. I will probably do something about the finish later when I know that it works like it should, until then it is a waste of time to do any polishing. 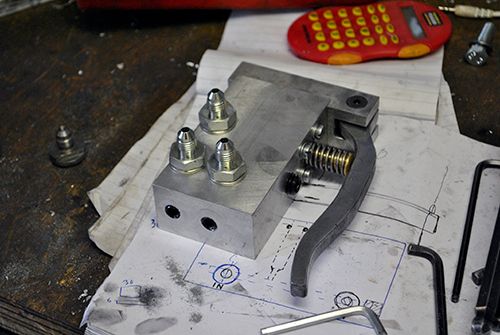 The next project for the evening was to continue building the air intake for the engine, I rolled an aluminum plate into the right shape and fixed it to the frame. 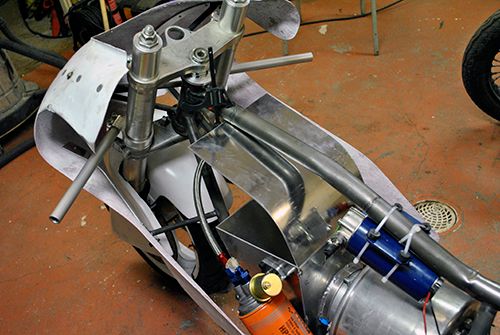 Then I split an aluminum tube to get a radius for the front wall of the air intake, this should make the ram air enter the air box a little bit better. :-) 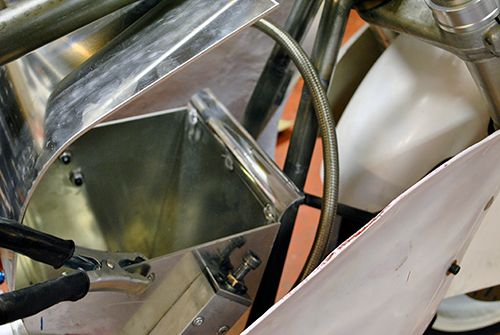 With those parts tacked together I could make a template of the side walls. 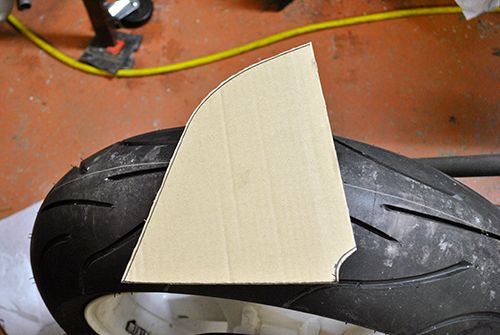 I only had enough aluminum for one side at home so I will have to go get the rest of my stash later. 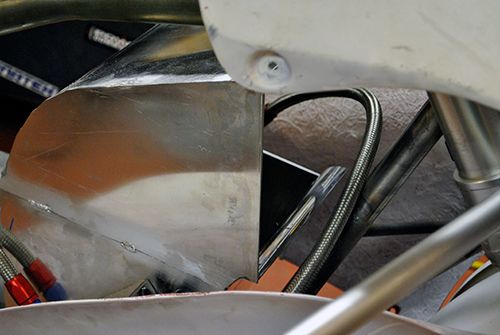 This is what it will look like anyway, the engine looks smaller and smaller as the air intake grows but it is needed if the engine is to get particle free air. The Y2K bike at Bonneville hadn´t room for more than a crude screen and it hardly made it out of the pits despite its 400hp Allison 250 C18 engine. 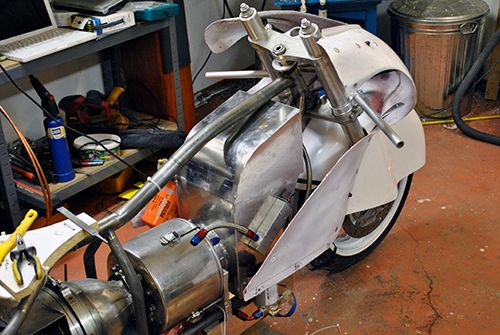 One last thing I did before I called it a night was to sketch a bit more on the ram air intake on the fairing, I can sacrifice some intake area to get the looks right since the space between the fender and fairing lets lots of air through so the engine should get more than enough air anyway. 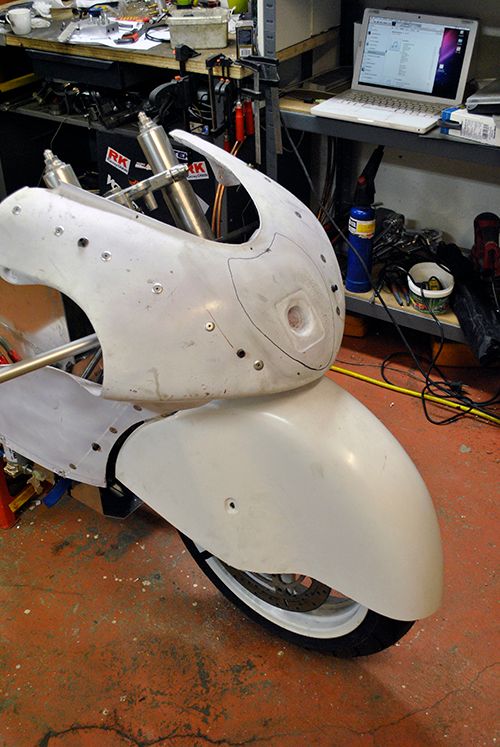 Cheers! /Anders |
|
sven
Veteran Member

Joined: February 2012
Posts: 102
|
Post by sven on Apr 17, 2013 9:59:21 GMT -5
Looks badass, nice work Sven |
|
nersut
Veteran Member
Joined: September 2012
Posts: 223
|
Post by nersut on Apr 20, 2013 21:00:29 GMT -5
Hi Anders Your bike build looks super nice! I am looking forward to see some video on the free turbine action. I just got my turbine up & running again, but my Allison turbine wheel is still collecting dust on the shelf... Keep up the good work! Cheers! Erik |
|
|
|
Post by Johansson on Apr 21, 2013 1:09:44 GMT -5
Thanks a lot Erik! Blow some dust off the Allison wheel and get some horsepower out of your engine too. I had a beer, rum and workshop evening last night, it was badly needed for a modern man at home with the youngest kid all week long. =) 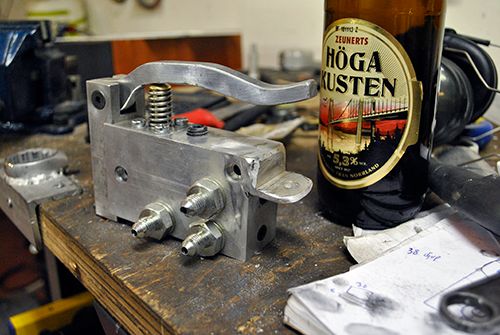 Two holes for M6 insex bolts were drilled in the throttle regulator and a throttle wire mount was made and welded to the regulator, now it is ready to be fitted to the bike for good. Cheers! /Anders |
|
|
|
Post by racket on Apr 21, 2013 2:31:42 GMT -5
Hi Anders
Heh heh ..........child minding only increases the pleasure of some workshop time :-)
Cheers
John
|
|
|
|
Post by turbochris on Apr 21, 2013 12:54:30 GMT -5
I drink in the shop, I'll never stop. Still have all my fingers. Takes longer to get things done but I enjoy it. How soon till the kid learns to help?
|
|
|
|
Post by finiteparts on Apr 21, 2013 13:58:42 GMT -5
Hi Anders,
Just wanted to say that your work is so creative and meticulous! You are definitely a craftsman. Thanks for sharing it!
~ Chris
|
|
|
|
Post by Johansson on Apr 21, 2013 15:14:33 GMT -5
Chris Krug: I never do any "delicate" work during the beer evenings, I try to save some straightforward hammer-and-anvil job for those nights. Beats a pub night easily, it is extremely fun to spend an evening alone in the workshop drinking beer and building stuff. The other Chris: Thank you very much, I truly enjoy seeing this bike come to life and the "freestyle designing" I do as I work is very rewarding. If I had made a complete set of drawings first it would be no fun at all. I have had lots of help from John Wallis with the engine design but I´ve built it completely after my own head instead of simply copying his ideas, I guess it goes back to my obsessive reluctance of following drawings. Cheers! /Anders |
|
|
|
Post by Johansson on Apr 23, 2013 13:33:16 GMT -5
Rum is mum for the gum. :cheers: Last night I fitted a pair of Spider throttle grips, very fancy with Shock Absorbing™ and all. To me they just looks like a pair of rubber tubes though... :roll: 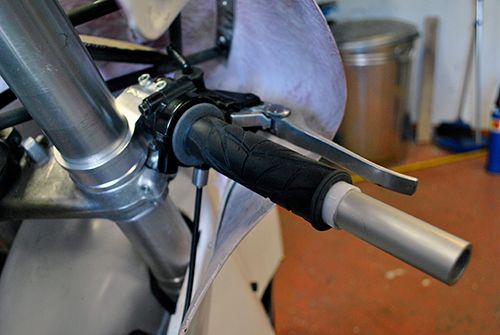 The throttle wire was fitted after I made a adjustable wire bolt, I started making one from scratch in brass but halfway through I remembered that I had wrecked my M8 threading die so it was the scrap bin for the fancy brass screw. I ended up drilling through a long M8 bolt instead... :-(  At this setting things should be passing by rather fast. :-) 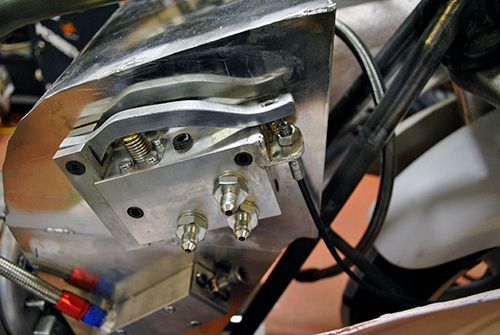 I´ve bought a 1 1/2" Autometer fuel pressure gauge which dropped in a couple of days ago, I will fit it after both the fuel filter and the solenoid so I can see exactly what pressure the injectors see. 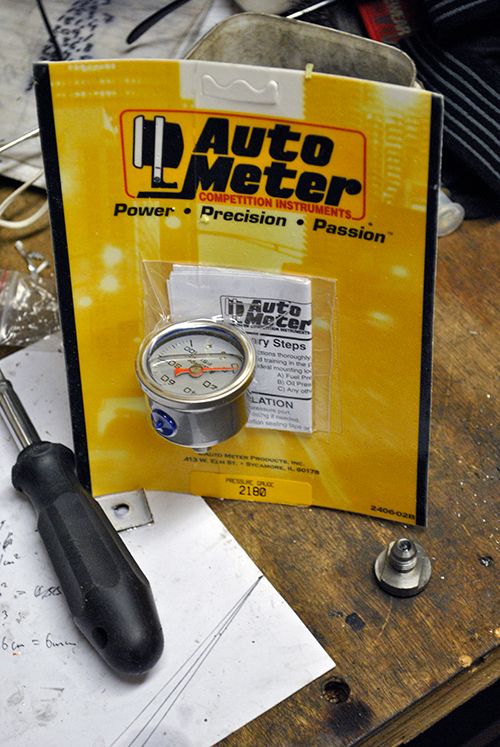 I also had to cut the front wheel stand down 4cm to get clearance for the fender, it is a tight fit but it works. 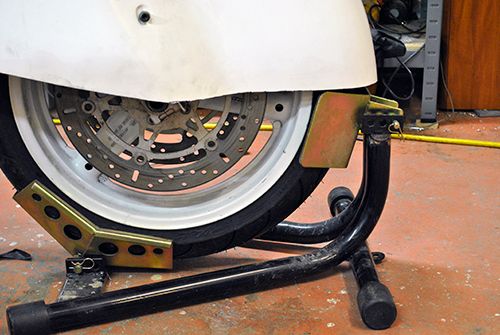 Cheers! /Anders |
|
|
|
Post by Johansson on Apr 26, 2013 7:04:40 GMT -5
Last night I spent some time on the remaining fuel system, I needed to connect the fuel shutoff solenoid, fuel filter and fuel pressure gauge somehow. 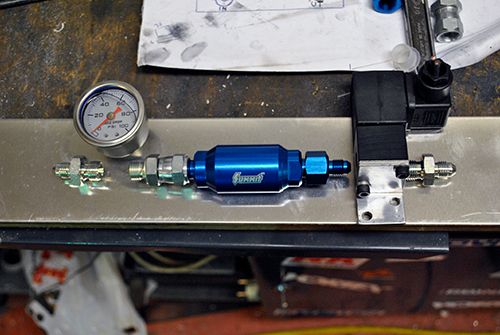 I cut a chunk of aluminum off a longer rod and trued it on the mill. 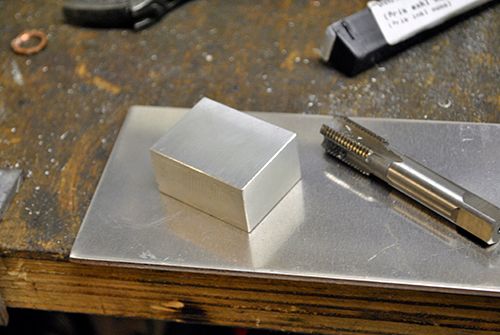 Drilling and milling, the same old story as always. 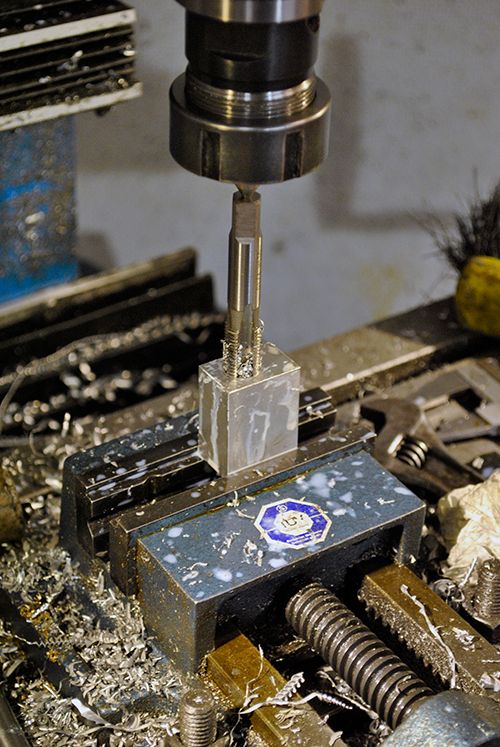 A couple of JIC 7/16" couplings later and it was finished! 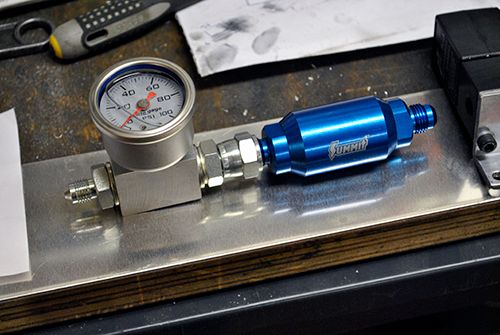 I need a 1/8"-27 die to make the coupling between the fuel filter and solenoid, will try to borrow one this weekend. Cheers! /Anders |
|


